5. Meeting Controls
This page explains all meeting controls—mute, language settings, screen sharing, and more—for multilingual video calls, broadcasts, and in-person sessions.
Whether you’re hosting a multilingual video call, broadcast, or in-person session, knowing how to use the platform’s controls is key to a smooth experience. This guide introduces each button and feature available during a meeting, so you can manage participants, language settings, and content sharing with confidence.
Mute/Unmute
The Mute/Unmute button toggles your microphone on and off during a conversation. Click to mute when you’re not speaking, and unmute to resume talking.
You can mute or unmute yourself before joining a meeting by clicking the microphone icon.

This button is also available in the bottom left corner of your screen during the meeting.

Camera Start/Stop
The Start/Stop Camera button lets you turn your video on or off.
You can start or stop your camera before joining a meeting by clicking the camera icon.
You can also access this button during the meeting by clicking the camera icon located next to the microphone icon.

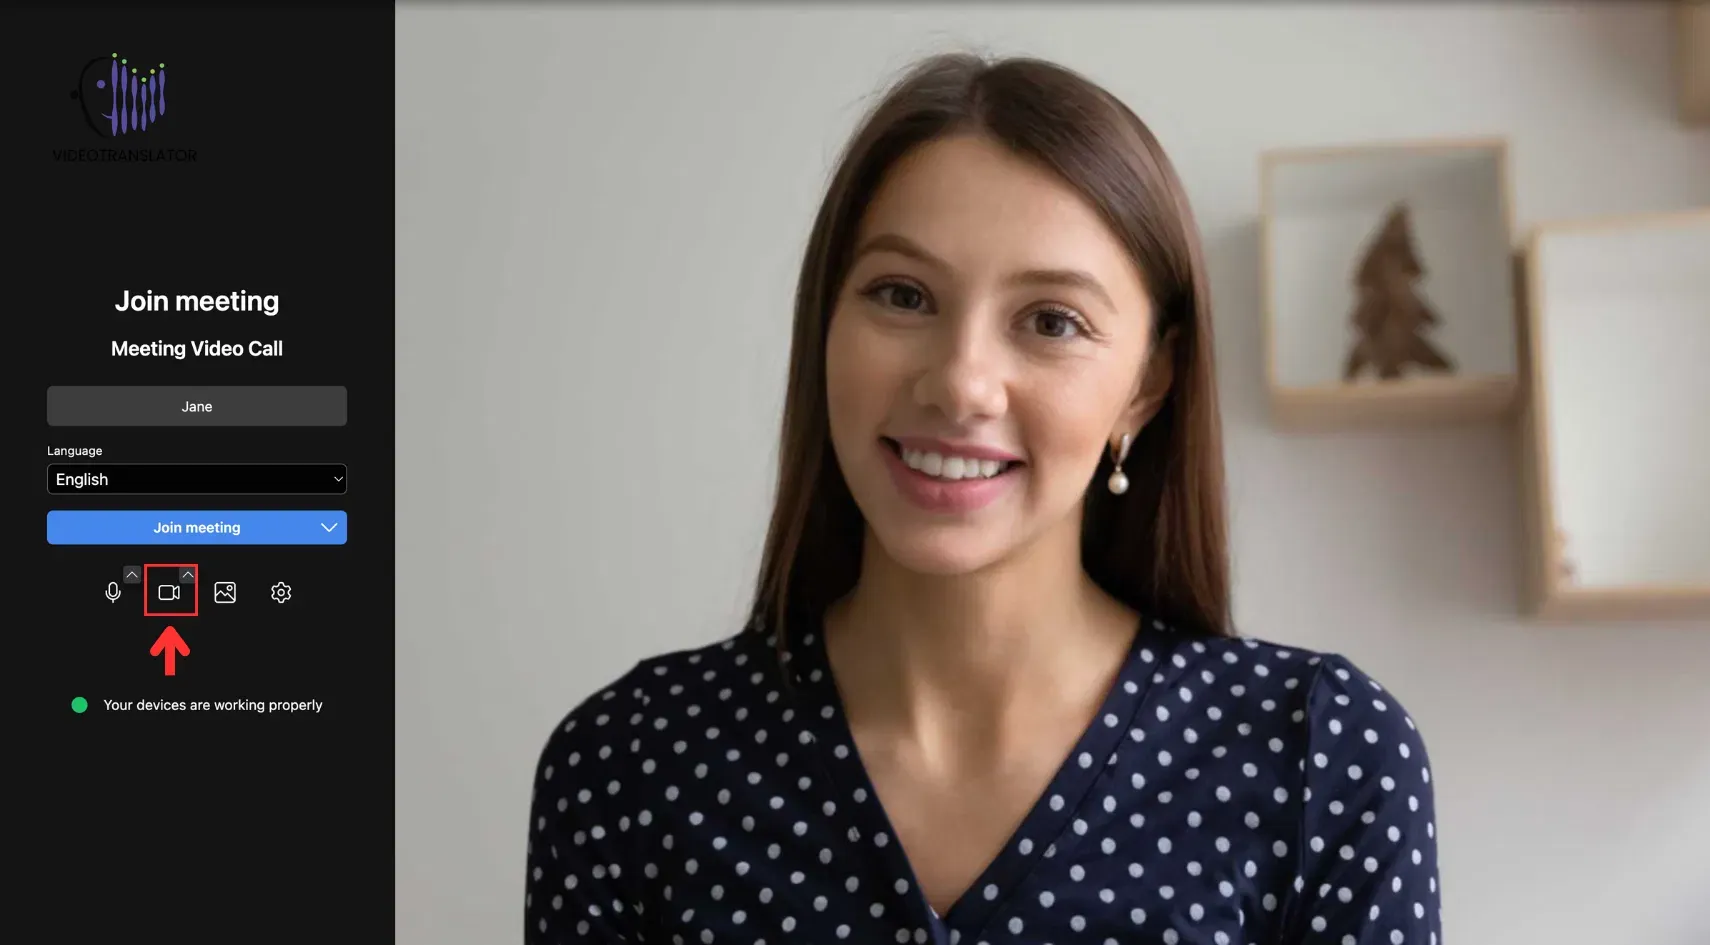
Change Background
Our videoconferencing app lets participants switch their video backgrounds to a virtual image or blurred effect, providing privacy or customisation during video meetings.
To do so, click the Image button before entering the meeting:
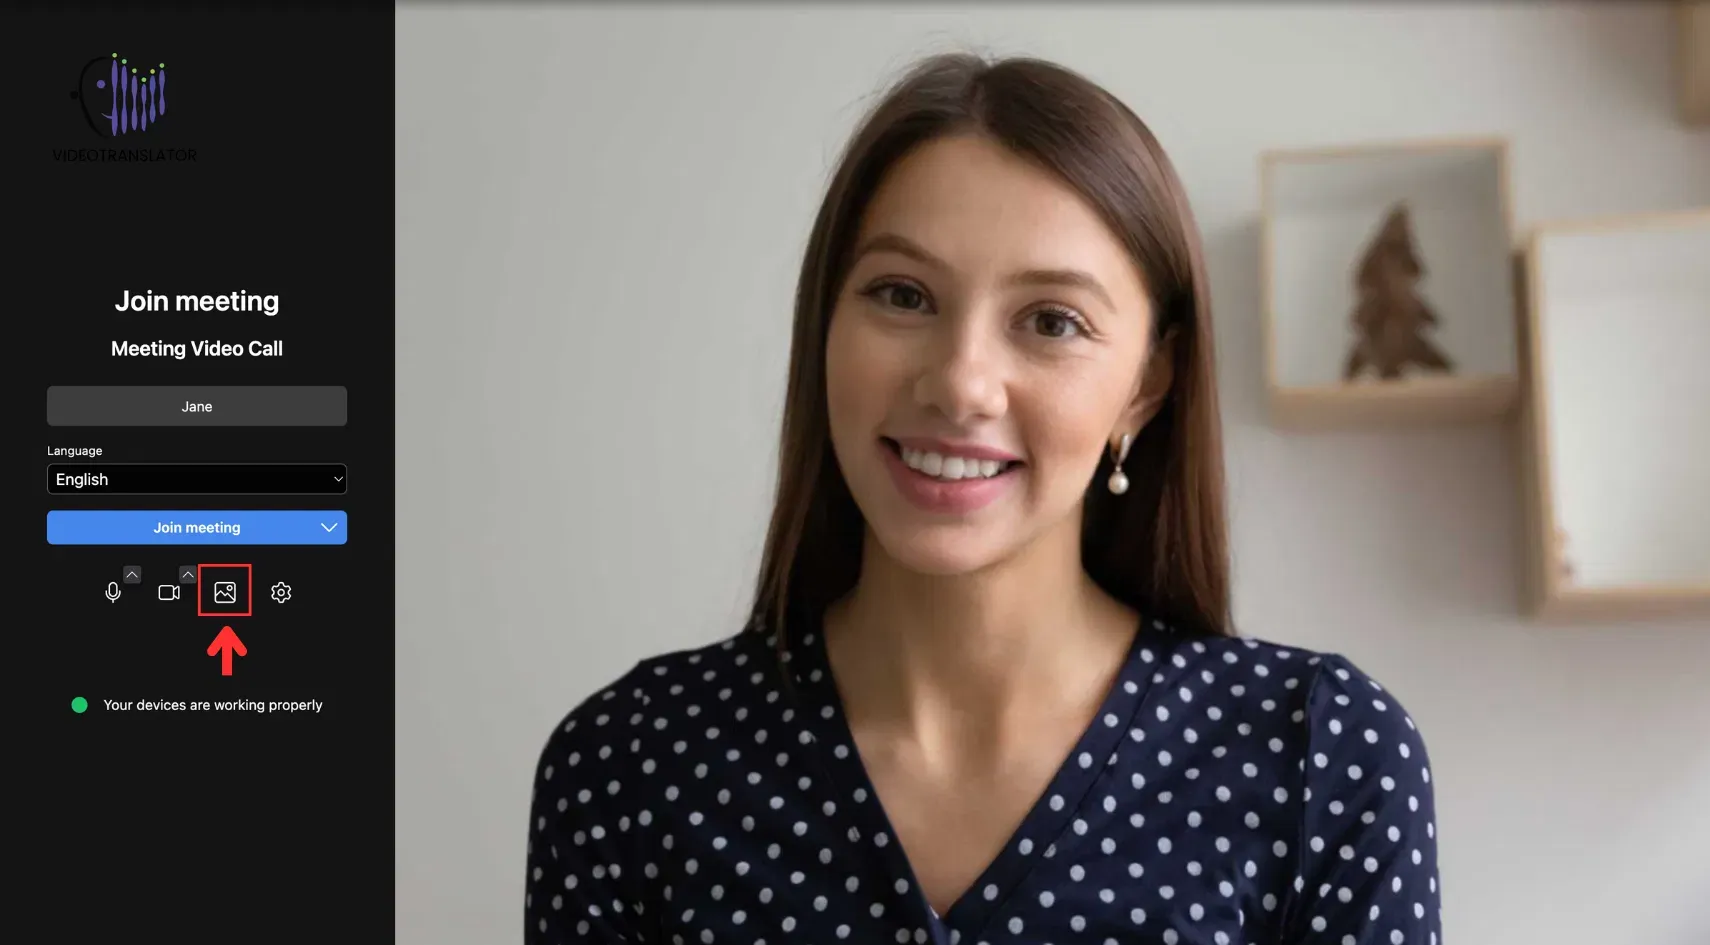
A pop-up box will appear where you can choose an existing background or upload a new pic:
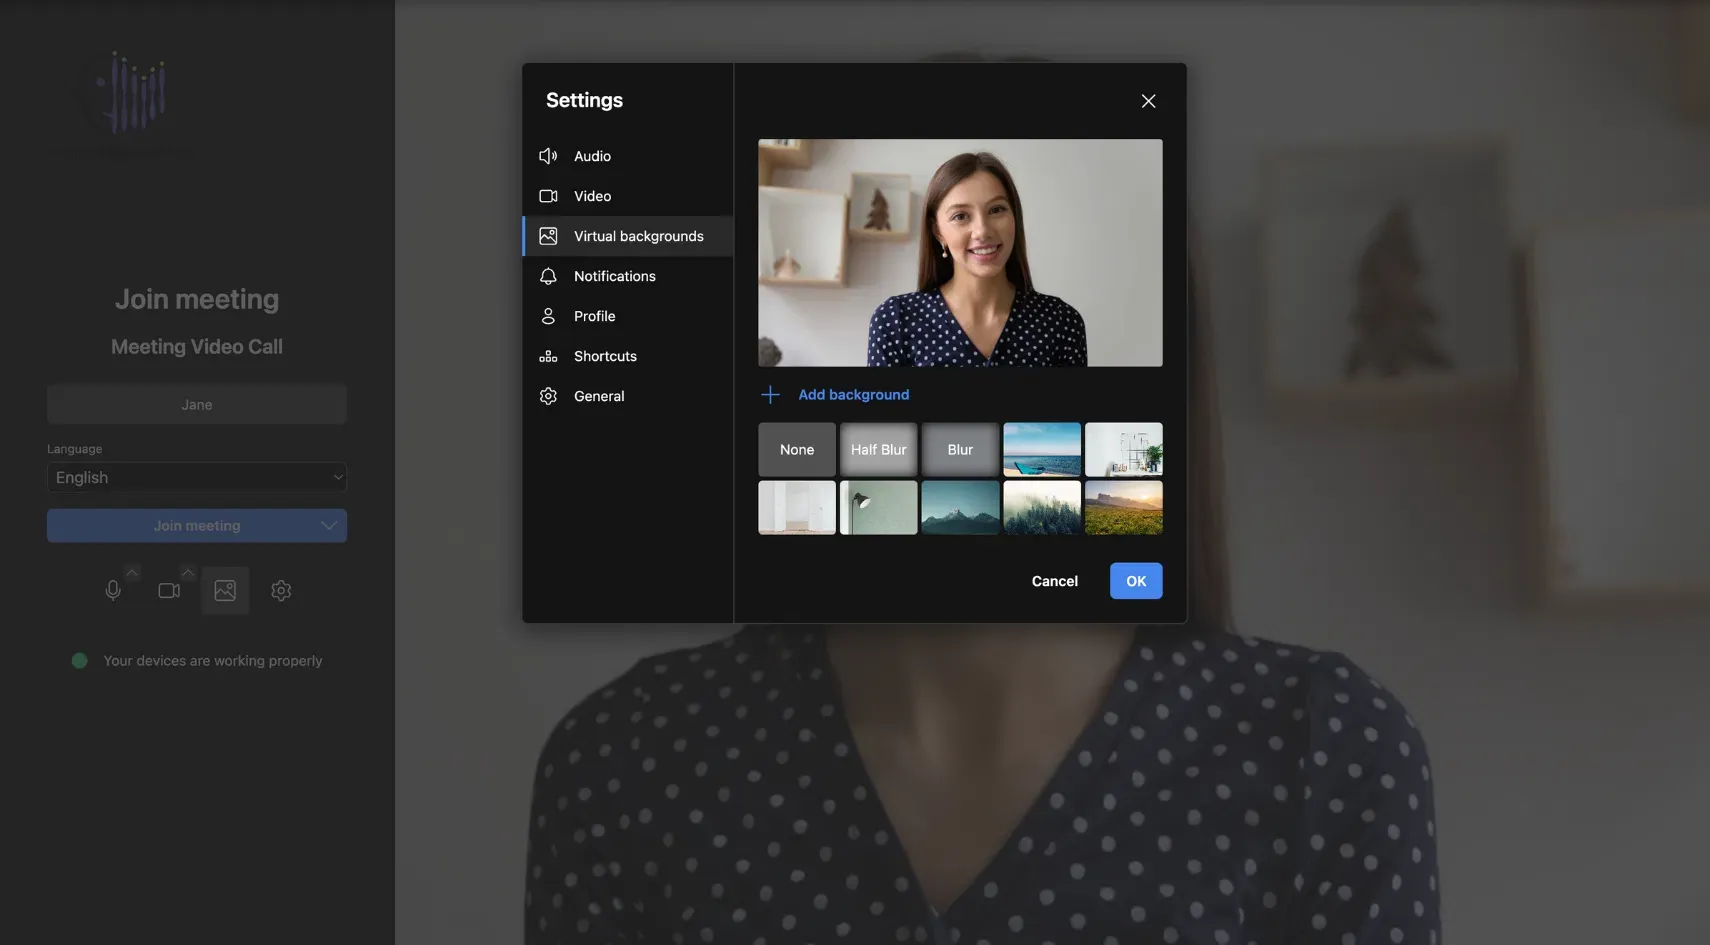
Alternatively, you can change your background during the meeting by clicking the small arrow (^) on the camera icon:
Screen Share
This feature allows participants to display their screens to others in the meeting, making presenting slides, documents, or other content easier.
To share your screen, click on the following button:

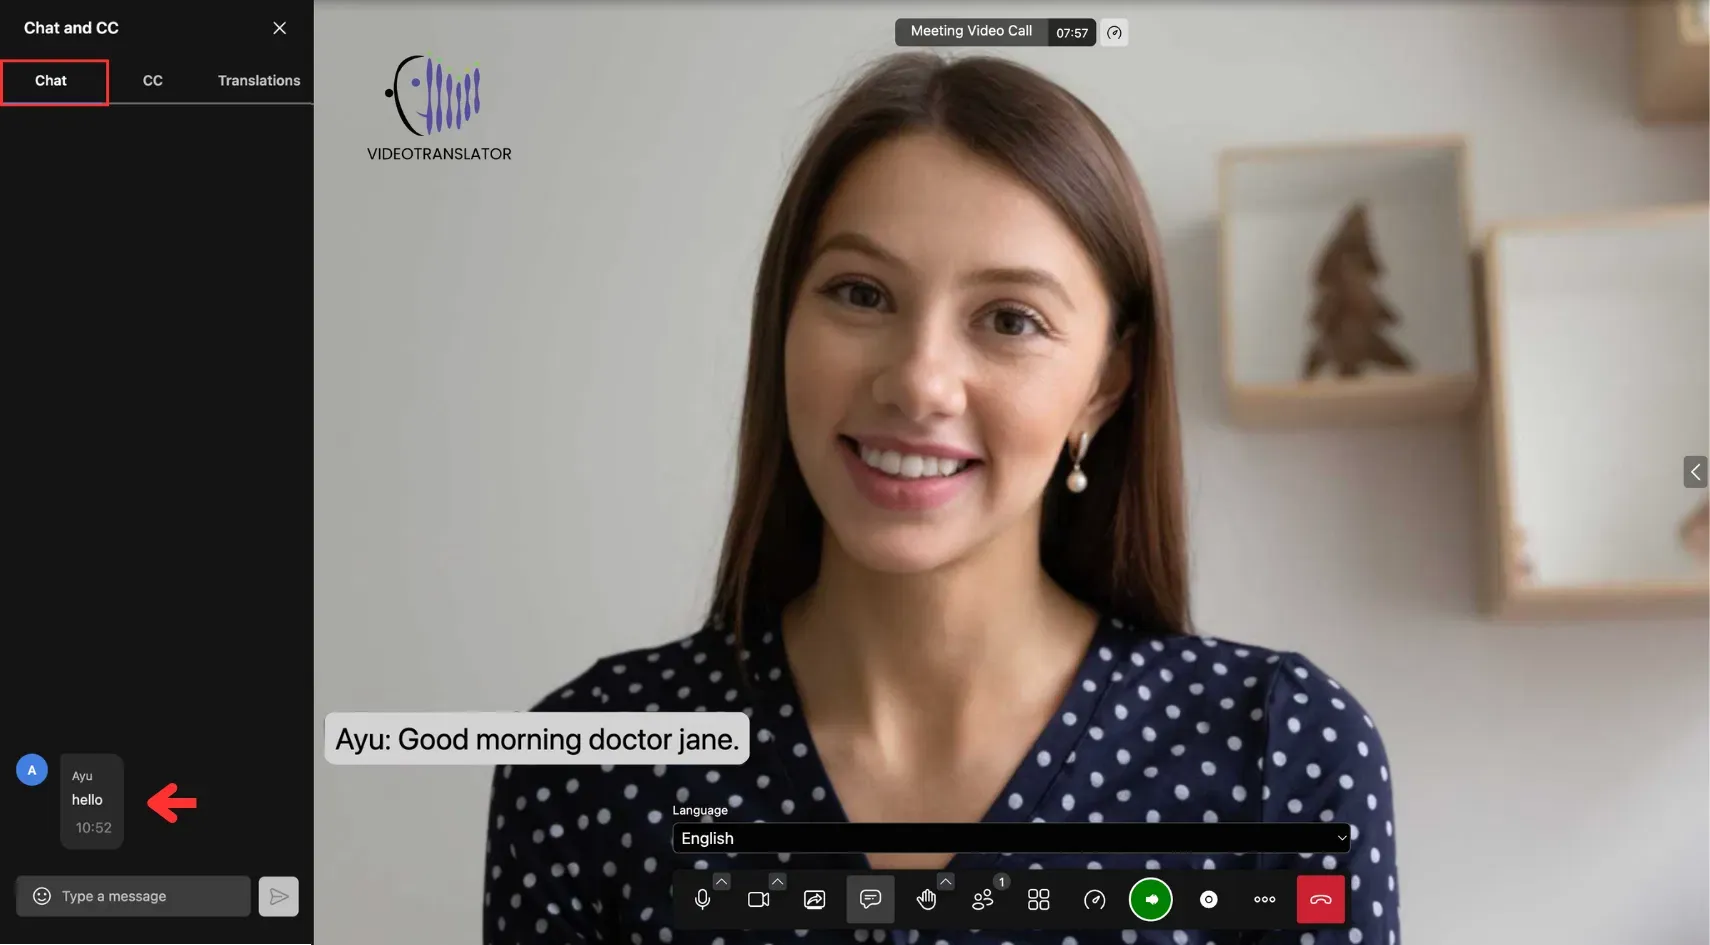
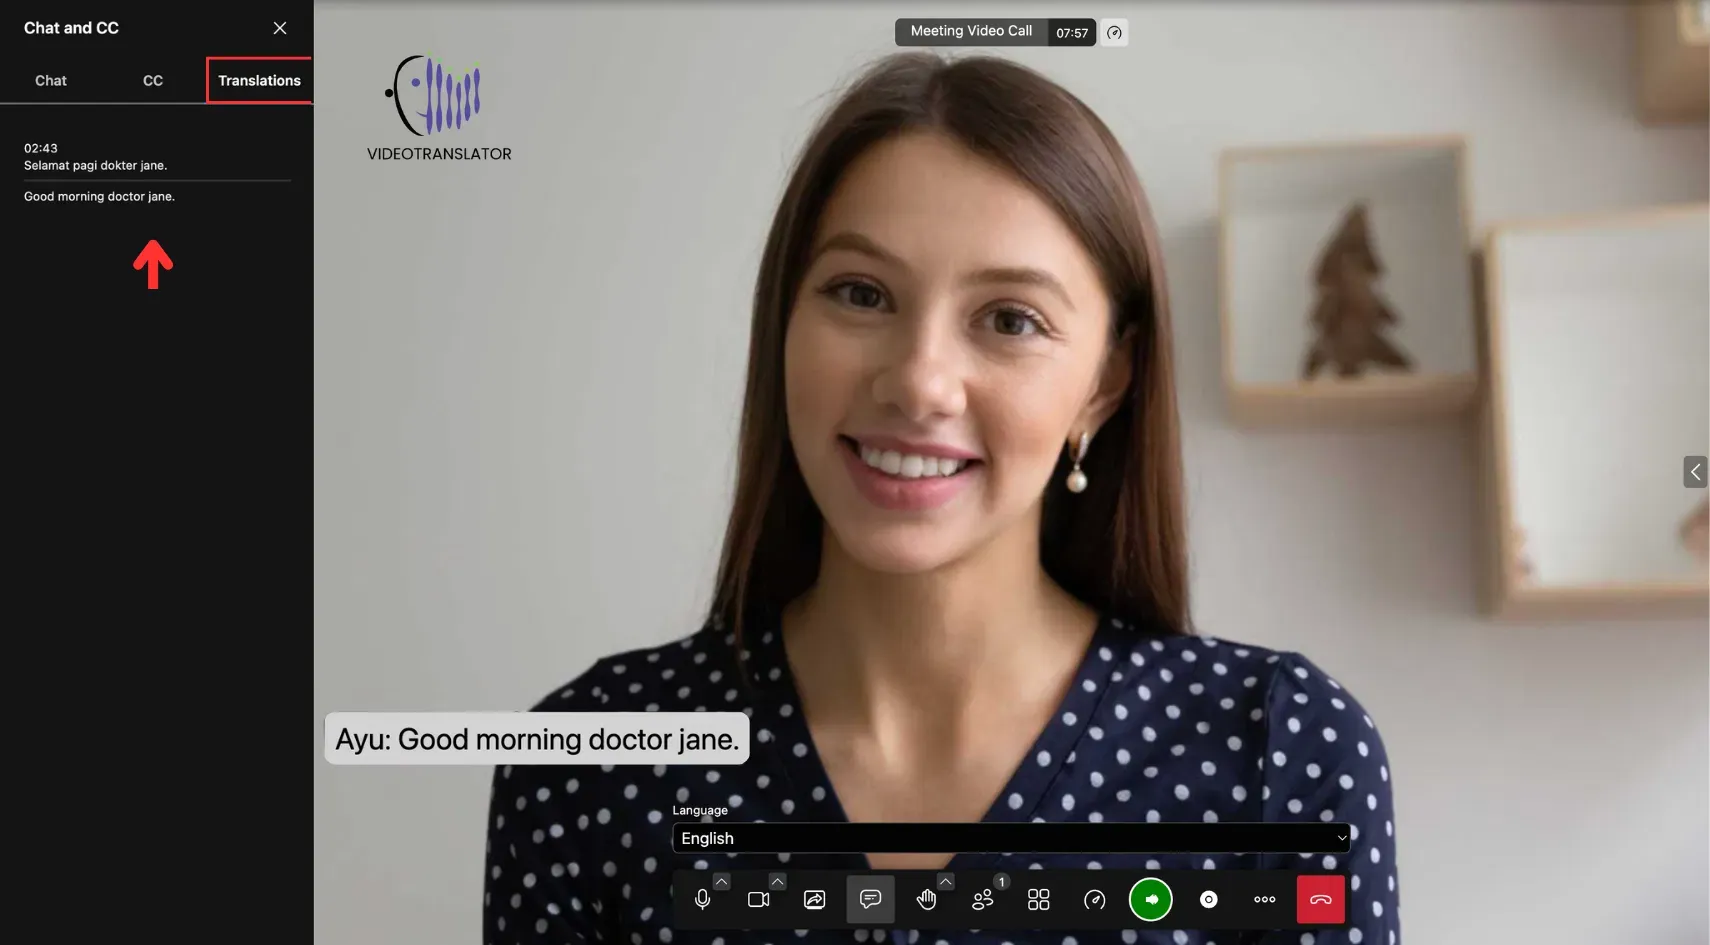
Chat
The chat button provides access to three key features: chat box, closed captions, and translations.

Chat Box
This feature allows participants to send and receive written messages during the meeting.
Click the button below to open the chat box.
Closed Captions
This feature displays translated captions of spoken content. Note: Captions are only available when the translation button is active.

Translation
This feature allows participants to view both the original and translated speech during the meeting. Note: Translation are only available when the translation button is active.
Raise Hand and Reactions
This feature lets participants signal they have a question or want to speak without interrupting the flow of the meeting.
To use this feature, click on this icon:

You can also give reactions by clicking the small arrow (^) on the Raise Hand button:

Participants Pane
This feature displays a list of all the individuals in the meeting, allowing users to view and manage who is present.
To view the participant’s pane, click on the following button:

Tile View
This feature lets users display participants in a grid layout, showing multiple video feeds on the screen at once for a more collaborative visual experience.
To enable tile view, click the following button during a meeting:

Voice Over Button
This feature enables users to toggle the text-to-speech function for translated text. When the voice-over option is turned on, the translated text will be spoken aloud in the target language. When turned off, the translation is only displayed as text, providing flexibility in how users receive the translation.

Translation Button
This button controls speech recognition during a conversation. When activated, it allows the system to listen, transcribe, and translate what the speaker says.
In Manual Mode, users must turn this button on before speaking and off after speaking. The system will only process and translate the speech once it’s turned off. In Continuous Mode, the button stays active automatically, so users don’t need to toggle it manually.

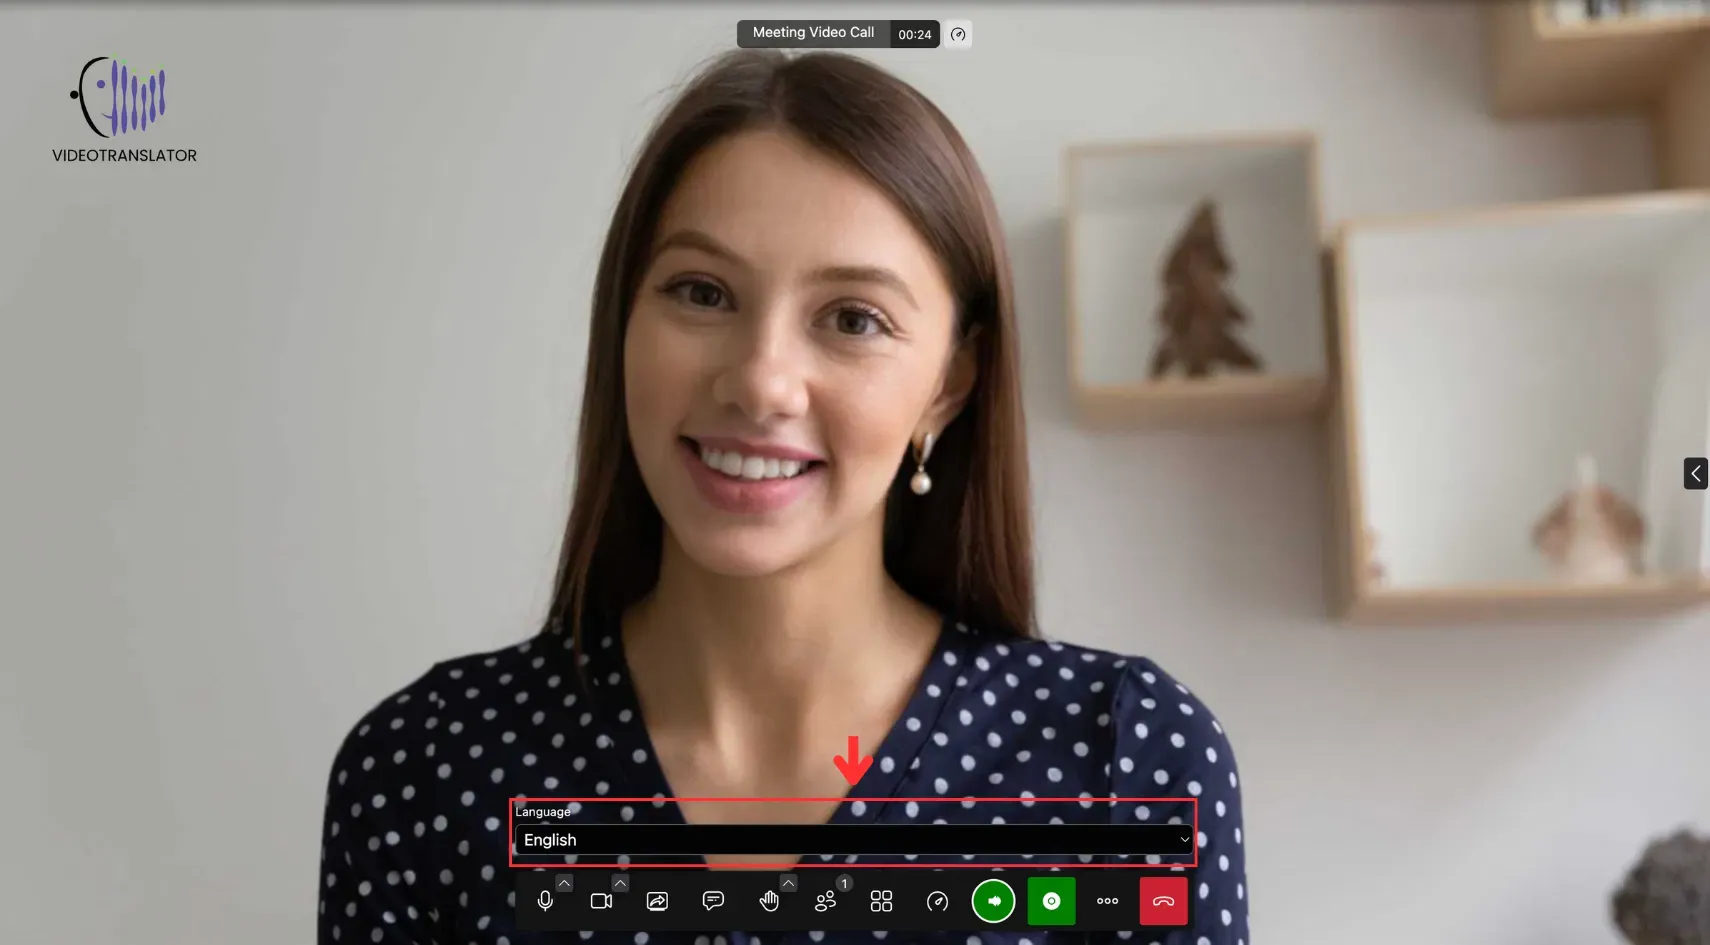
Switch Language
This feature allows participants to change their spoken language during a meeting. To switch your language, click on the following button. Note: This feature is only available in Quick Mode.
Leave/End Meeting
This feature allows participants to leave the meeting or, for moderators, to end it for everyone. To leave or end the meeting, click on the following button.

Notes:
- Leave Meeting: The meeting stays active and can be reused later.
- End Meeting (Moderator only): The meeting ends for all and is moved to the Archive.
More Settings
The three-dot icon provides access to More Settings, where you can find additional options for your meeting. This includes features like recording the meeting, enabling noise suppression, and other customisable settings to enhance your video conferencing experience.
