1. Create A Multilingual Video Call
Learn how to create a meeting with real-time translation by selecting source and target languages, inviting participants, and enabling multilingual support.
A video call meeting is a video communication feature that supports two or more participants in multilingual settings. During the call, each participant can speak in their chosen language. The spoken content is translated in real-time and delivered to other participants as text and optional text-to-speech in the target language.
There are two ways to create a multilingual video call meeting: using Quick Mode for instant setup or Custom Setup for more control and scheduling options.
1. Quick Mode (Default Setup)
Quick Mode instantly lets you create a video call for quick meetings or on-the-go needs. Each participant can select their preferred language and even switch languages during the meeting for maximum flexibility.
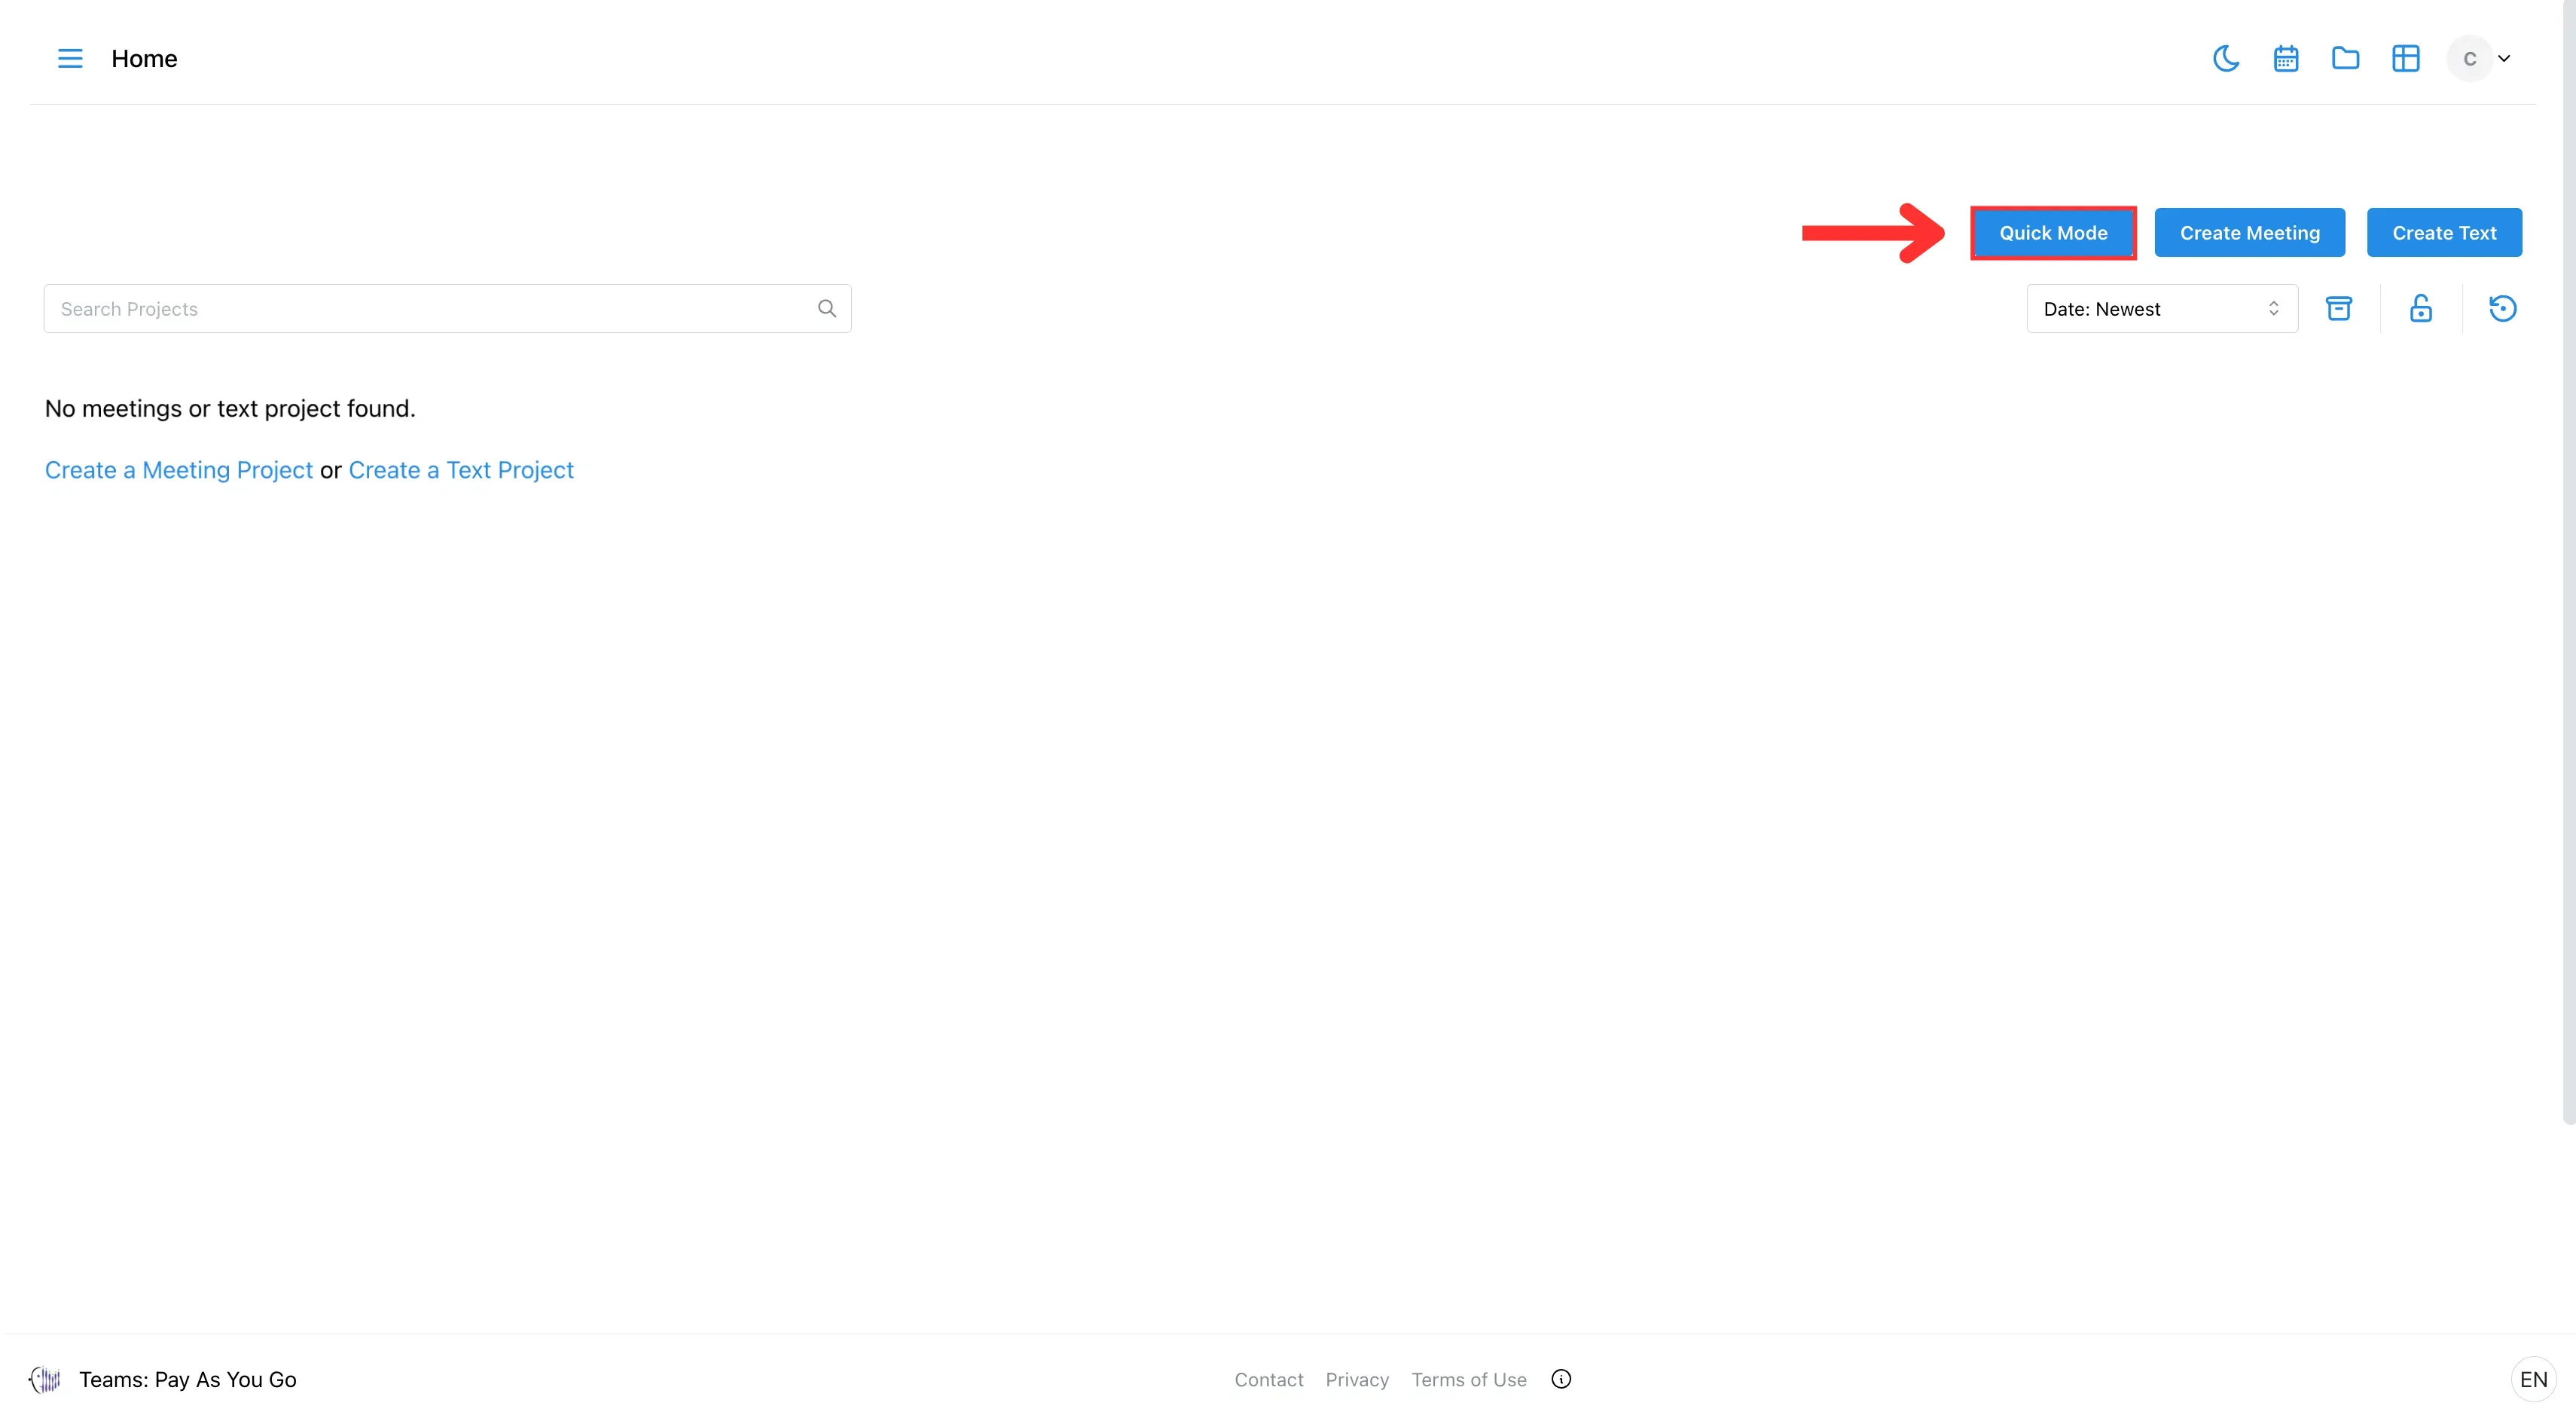
1. Click Quick Mode
Select the Quick Mode button in the top-right corner of the screen.
2. Choose Meeting Type and Dictionary
Select Video Call, then select a dictionary if needed.

After that, click Confirm.

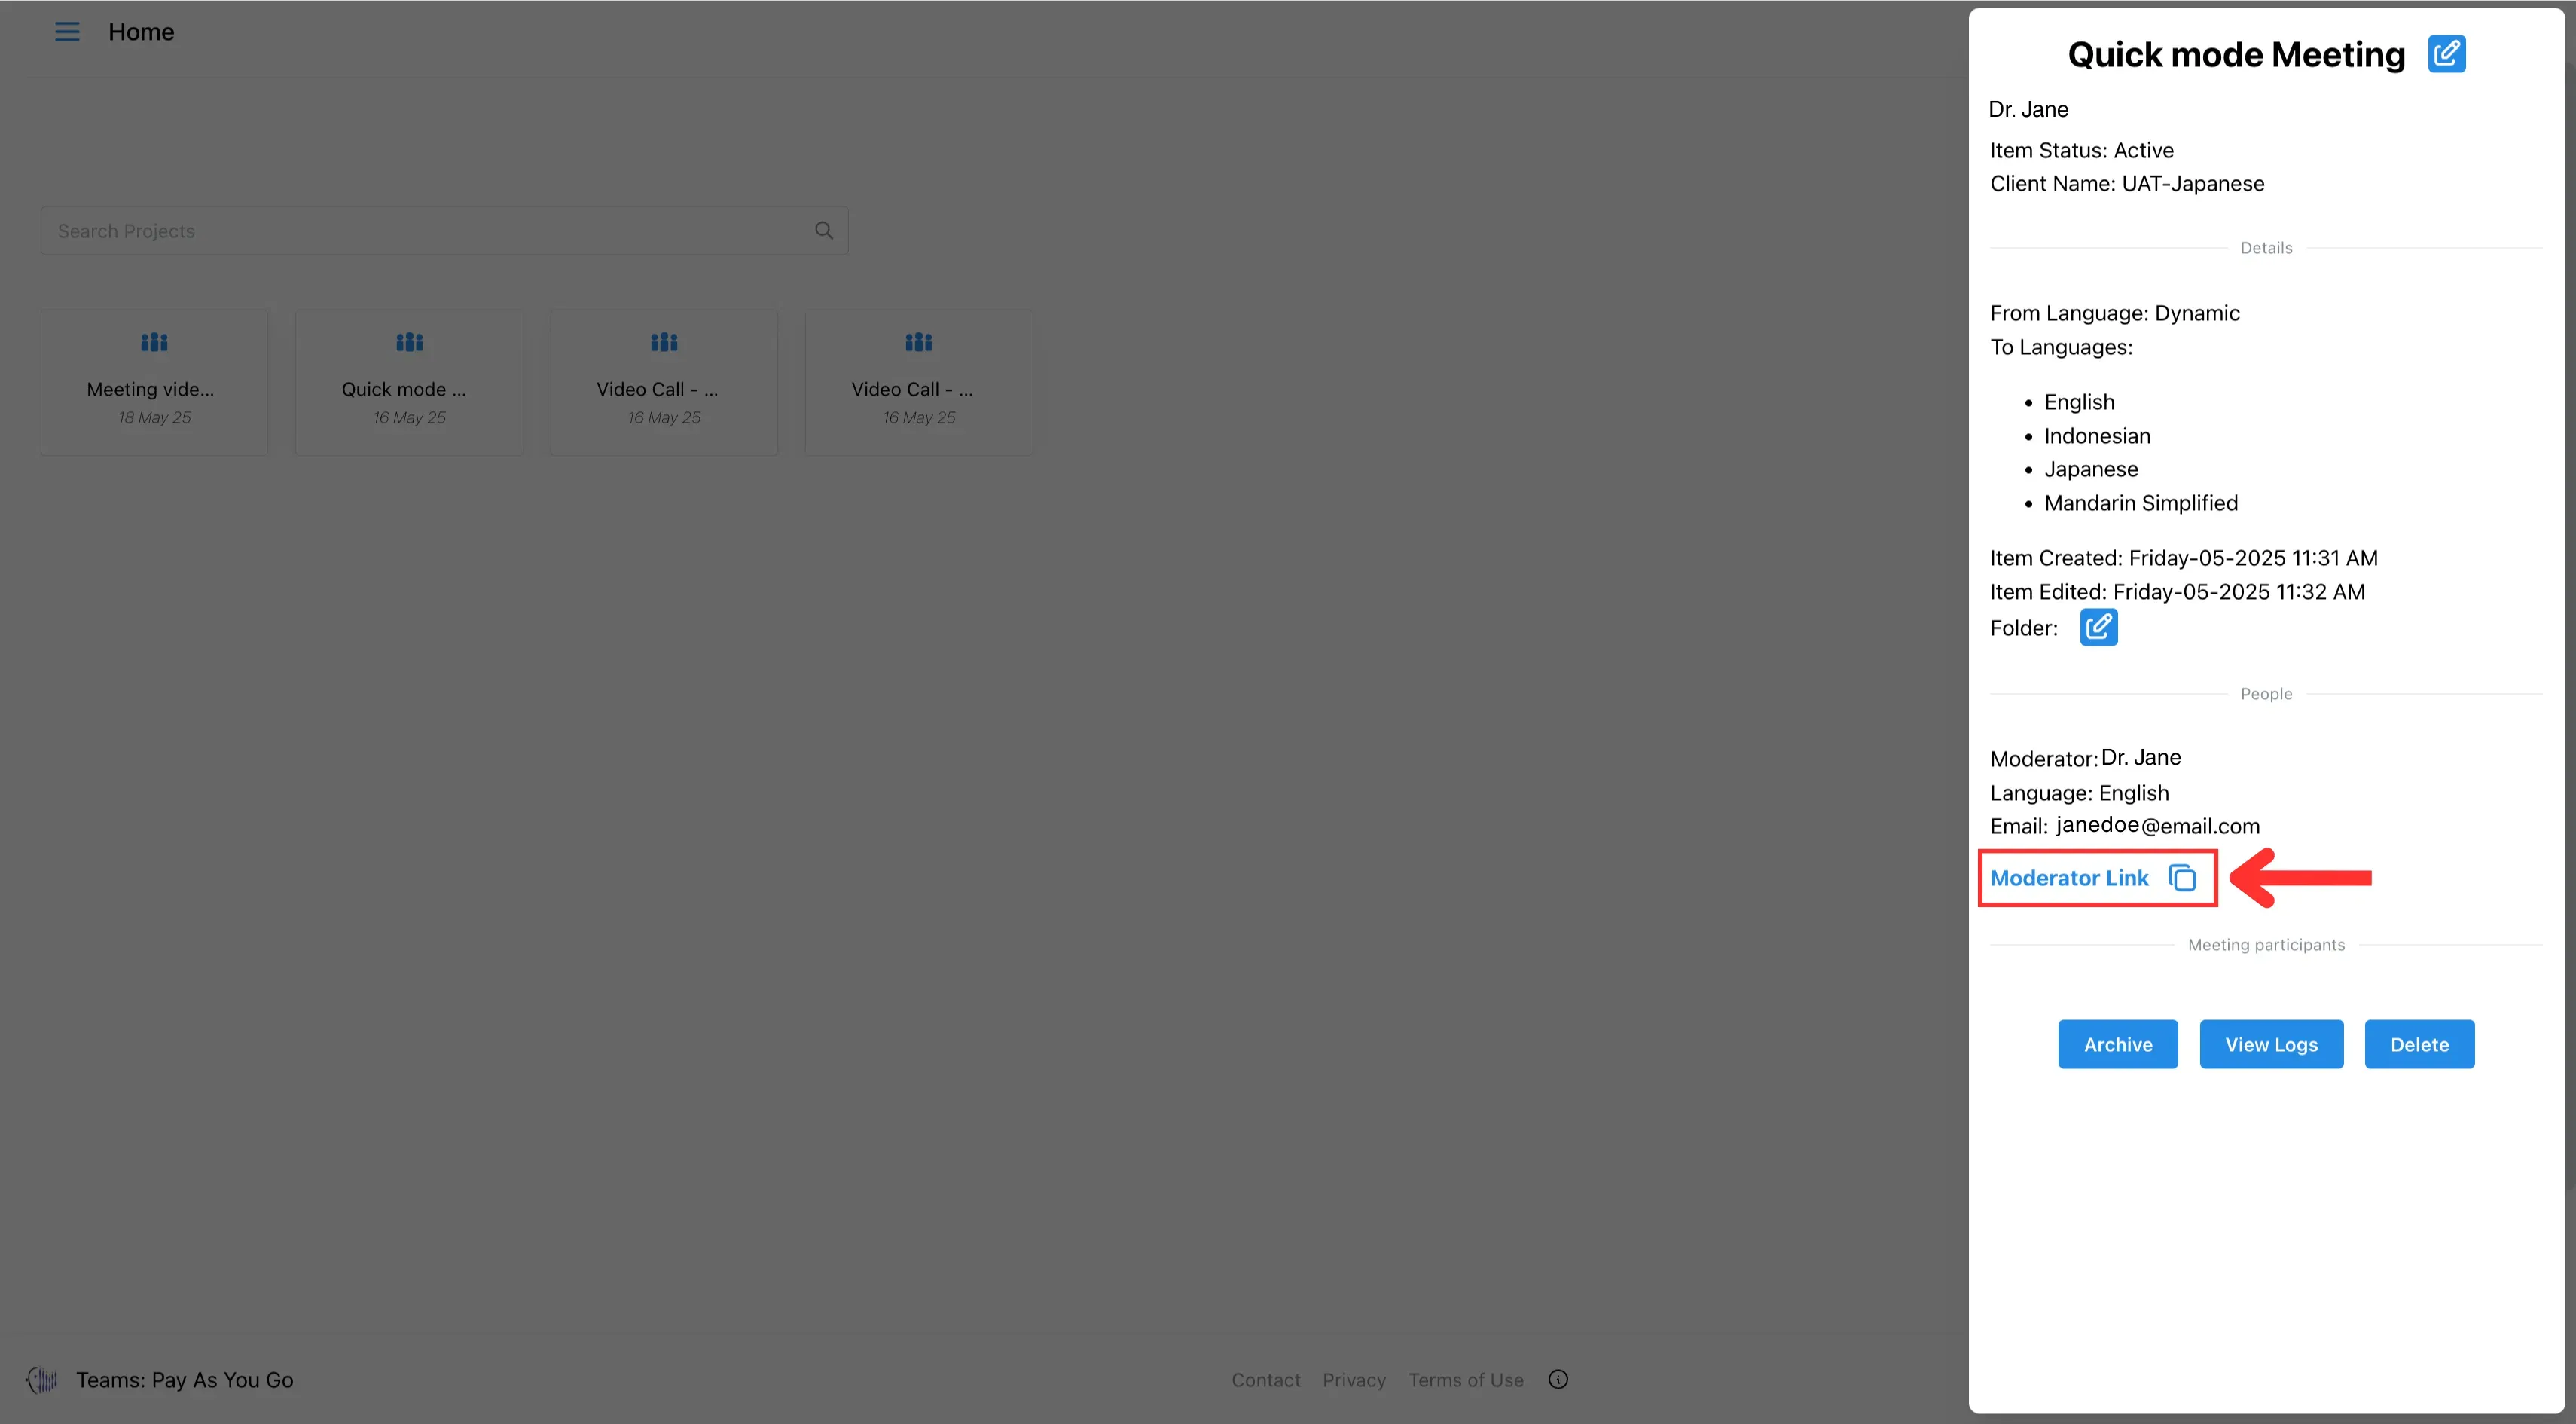
3. Invite Participants
Go to the homepage, click the meeting, copy the link, and share it with other participants.
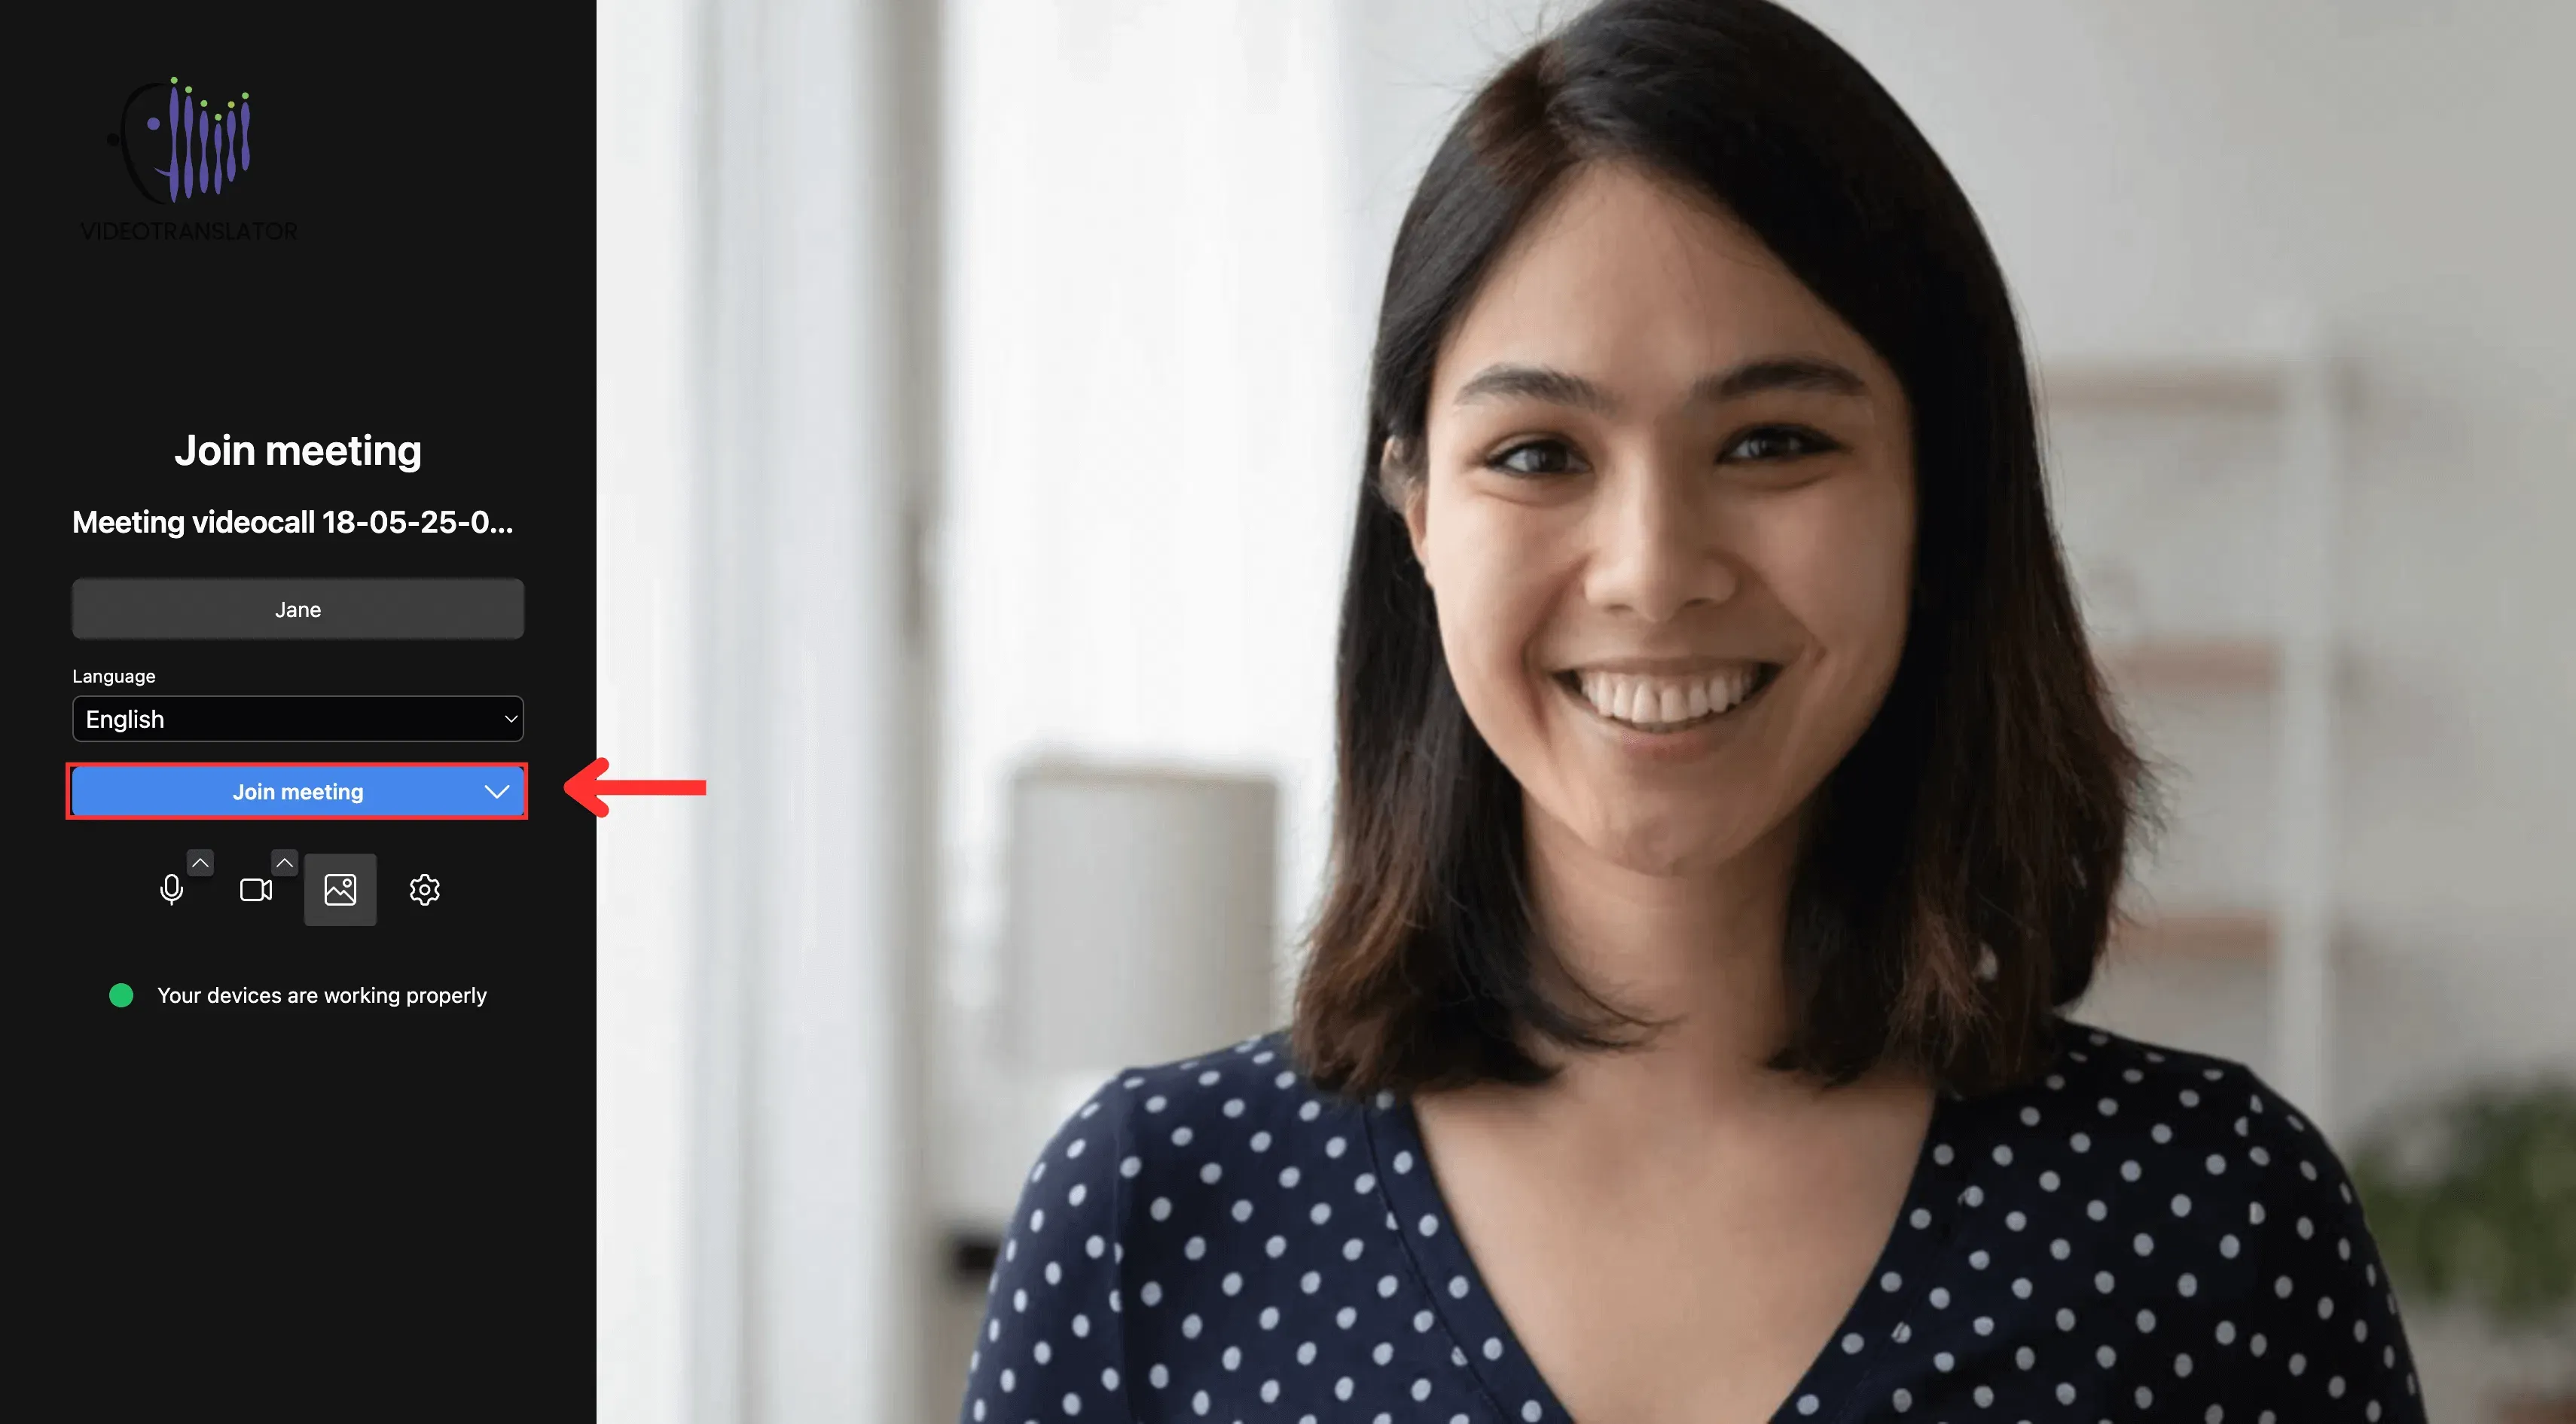
4. Set Your Name and Language
Enter your name and choose the language you speak.
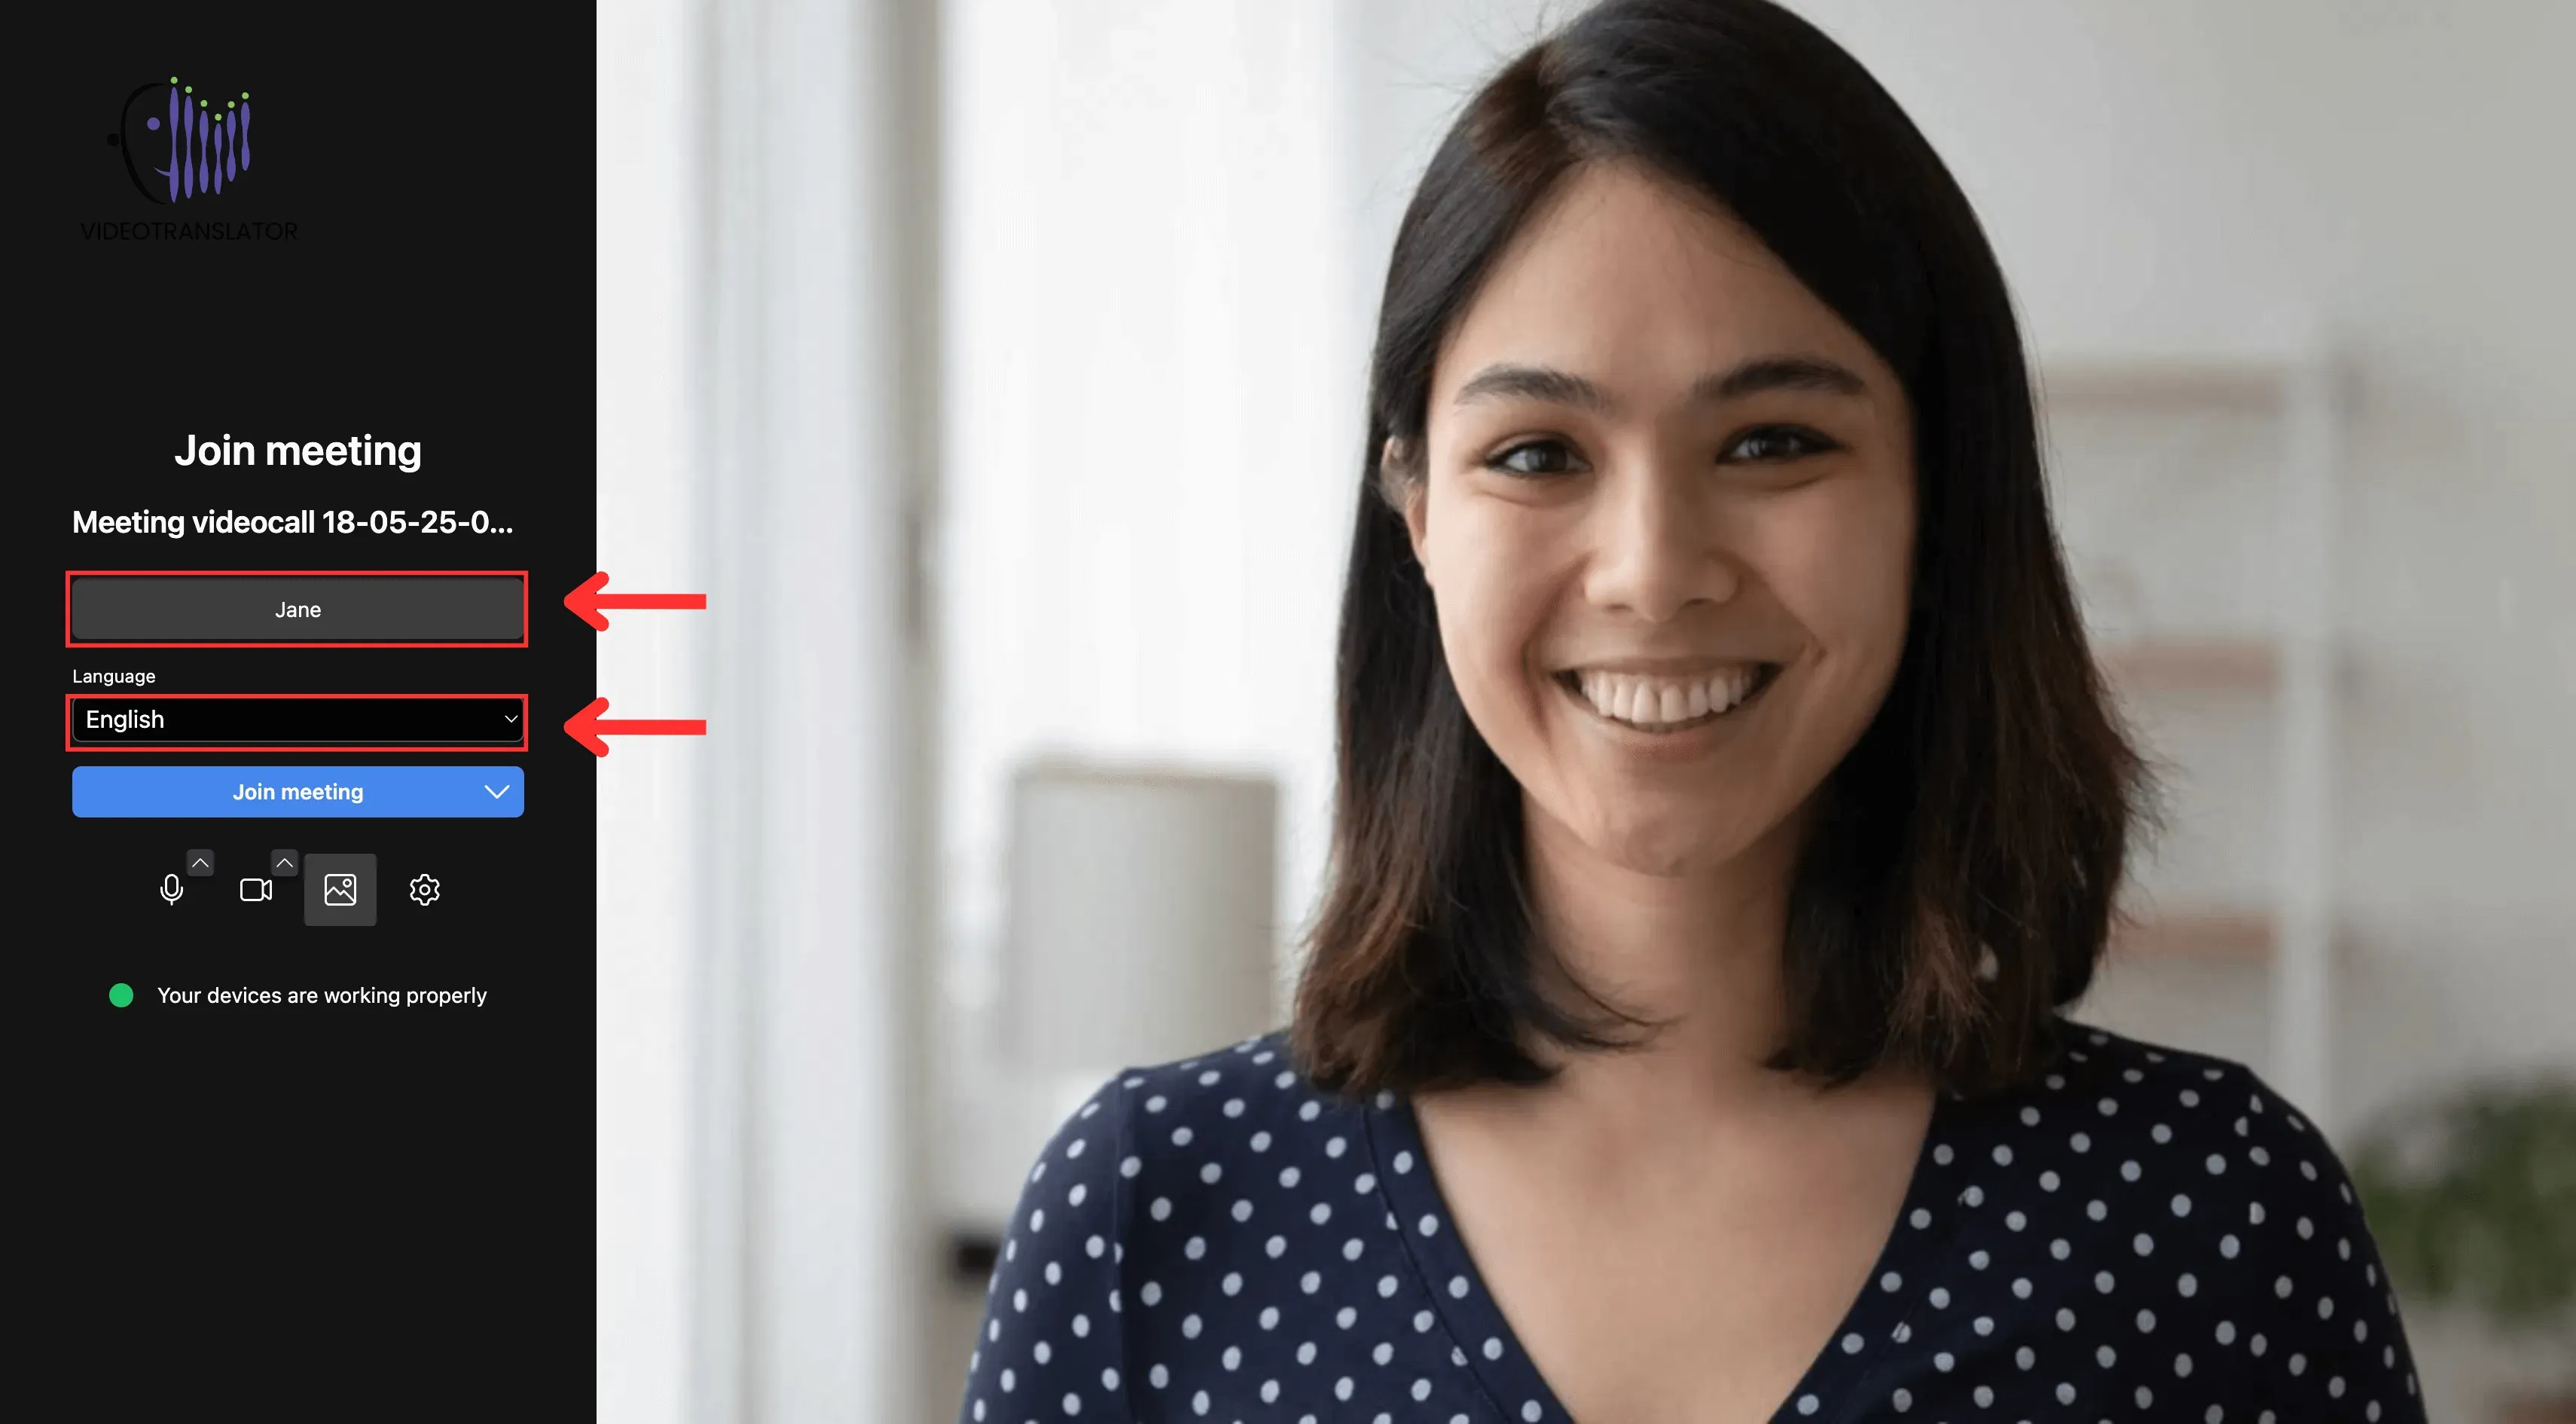
5. Join the Meeting
Click Join Meeting to start your multilingual conversation.
2: Create Meeting (Custom Setup)
Use this method if you want to customise your meeting settings—such as assigning moderators or linguists, setting specific languages per participant, or scheduling for a future time.
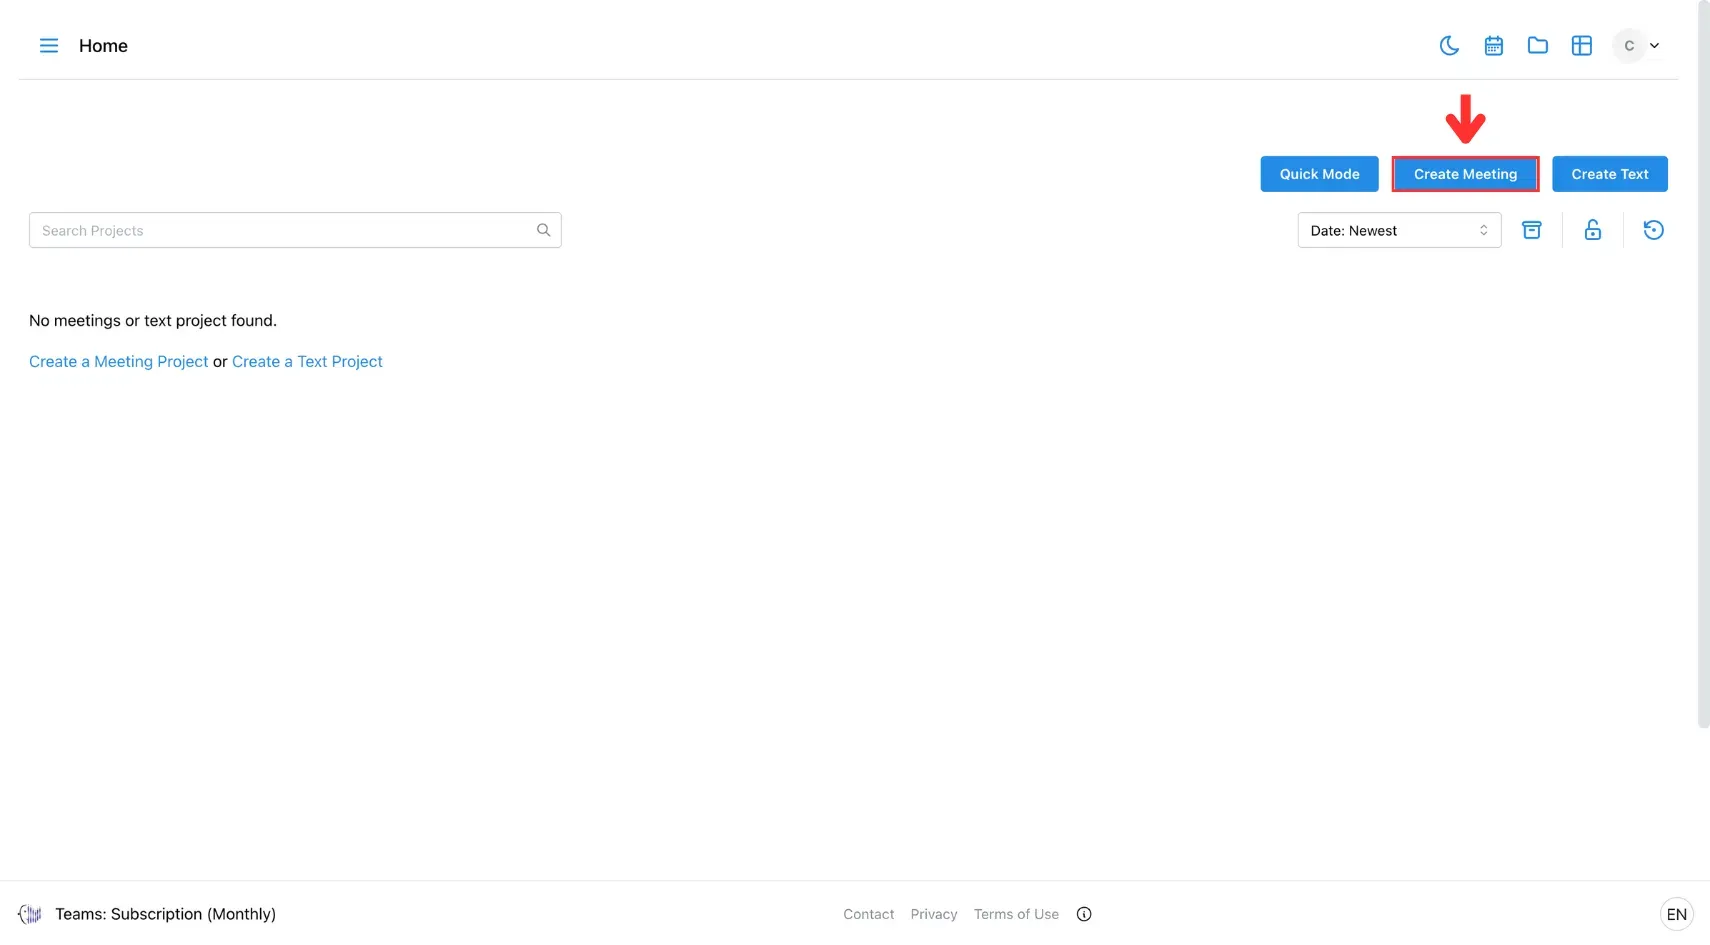
1. Click Create Meeting
Select the Create Meeting button in the top-right corner of the screen.
2. Choose Meeting Mode
Select Video Call, then choose your preferred mode:
- Manual Mode: You’ll manually toggle the translation button for better accuracy.
- Continuous Mode: Translates automatically without toggling.

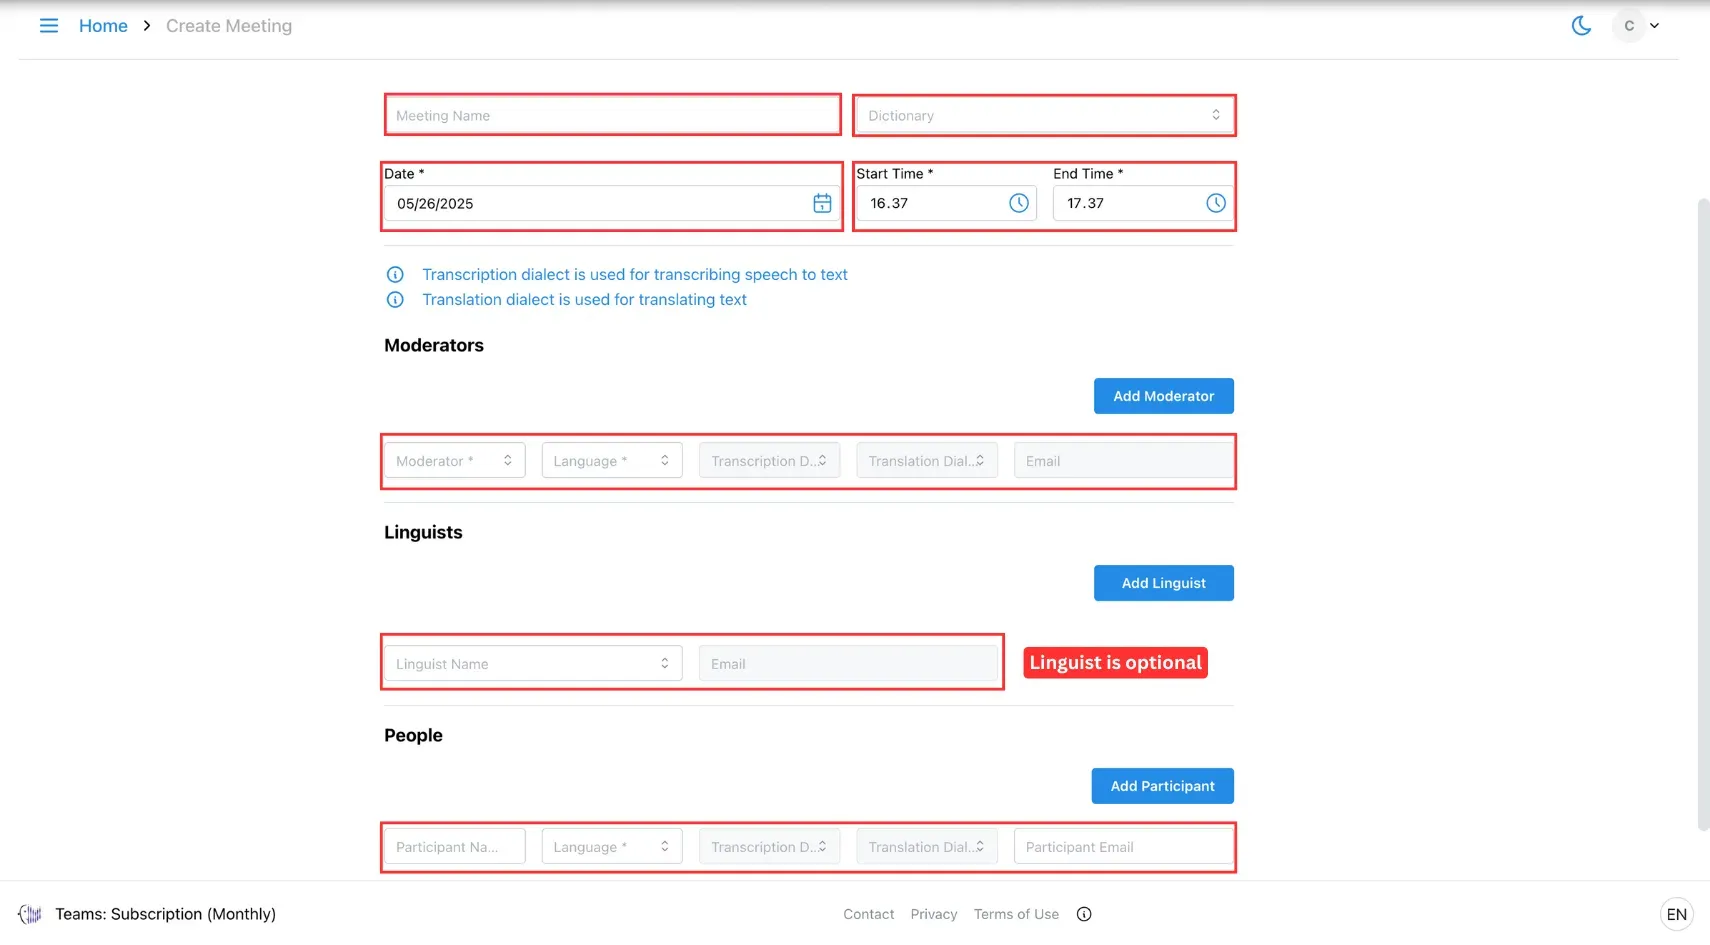
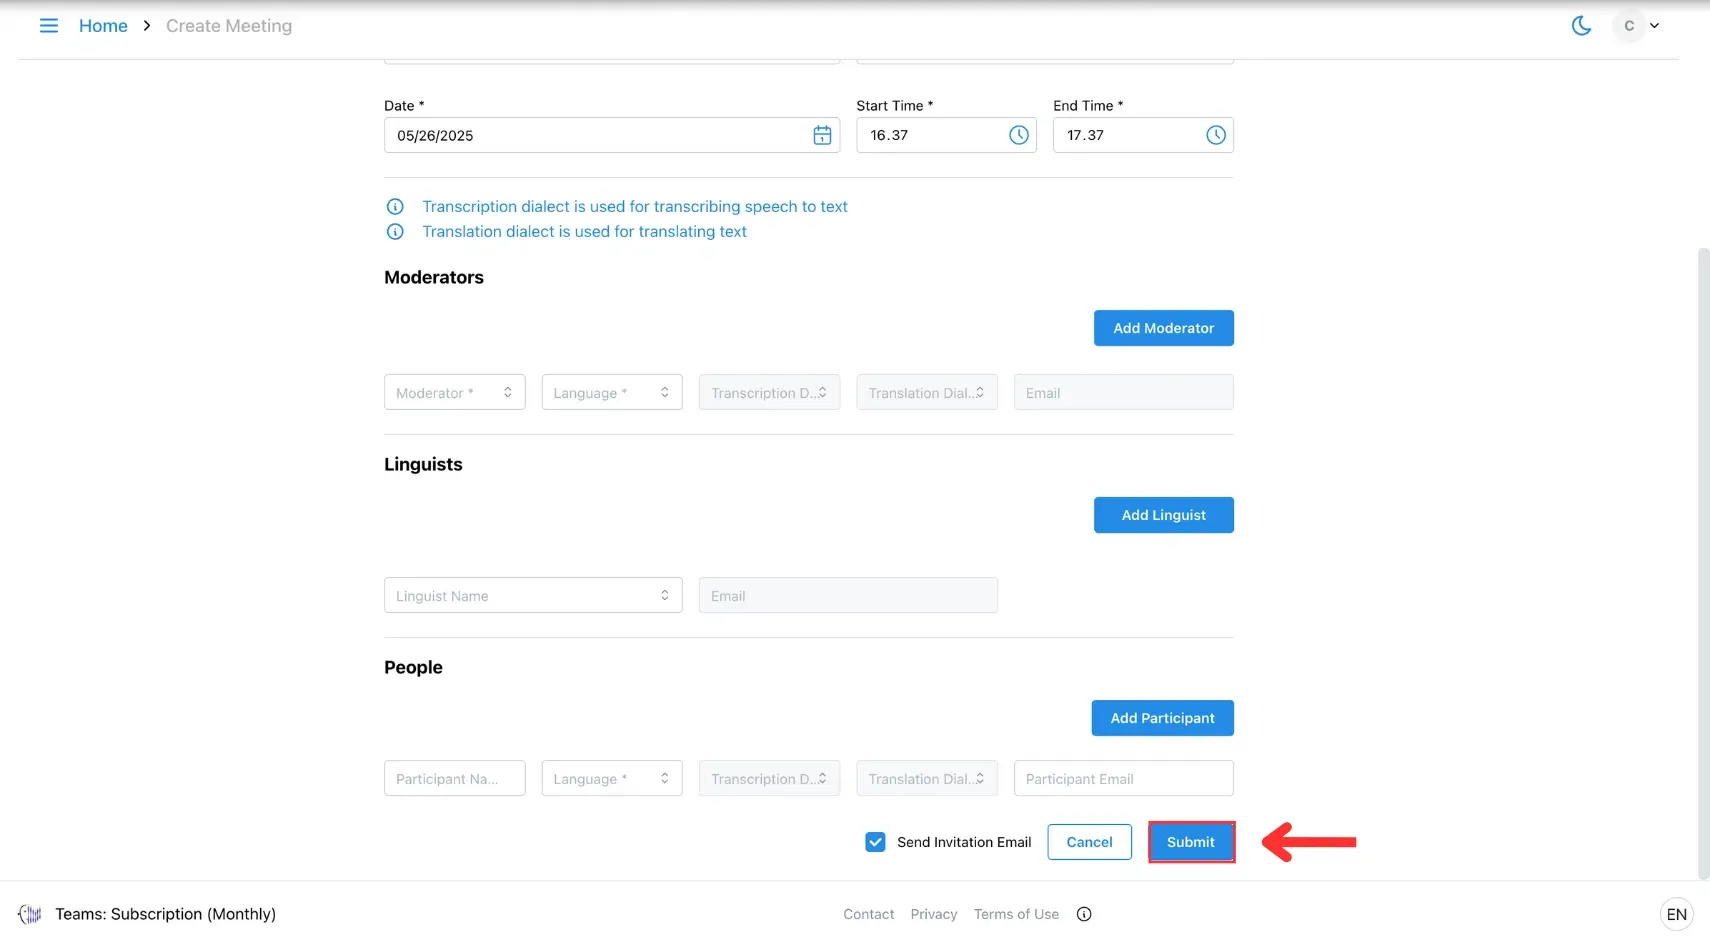
3. Fill In Meeting Details
Complete all required fields (especially those marked with *).
- In Transcription Dialect, choose the AI for transcribing speech.
- In Translation Dialect, choose the AI for translating text.
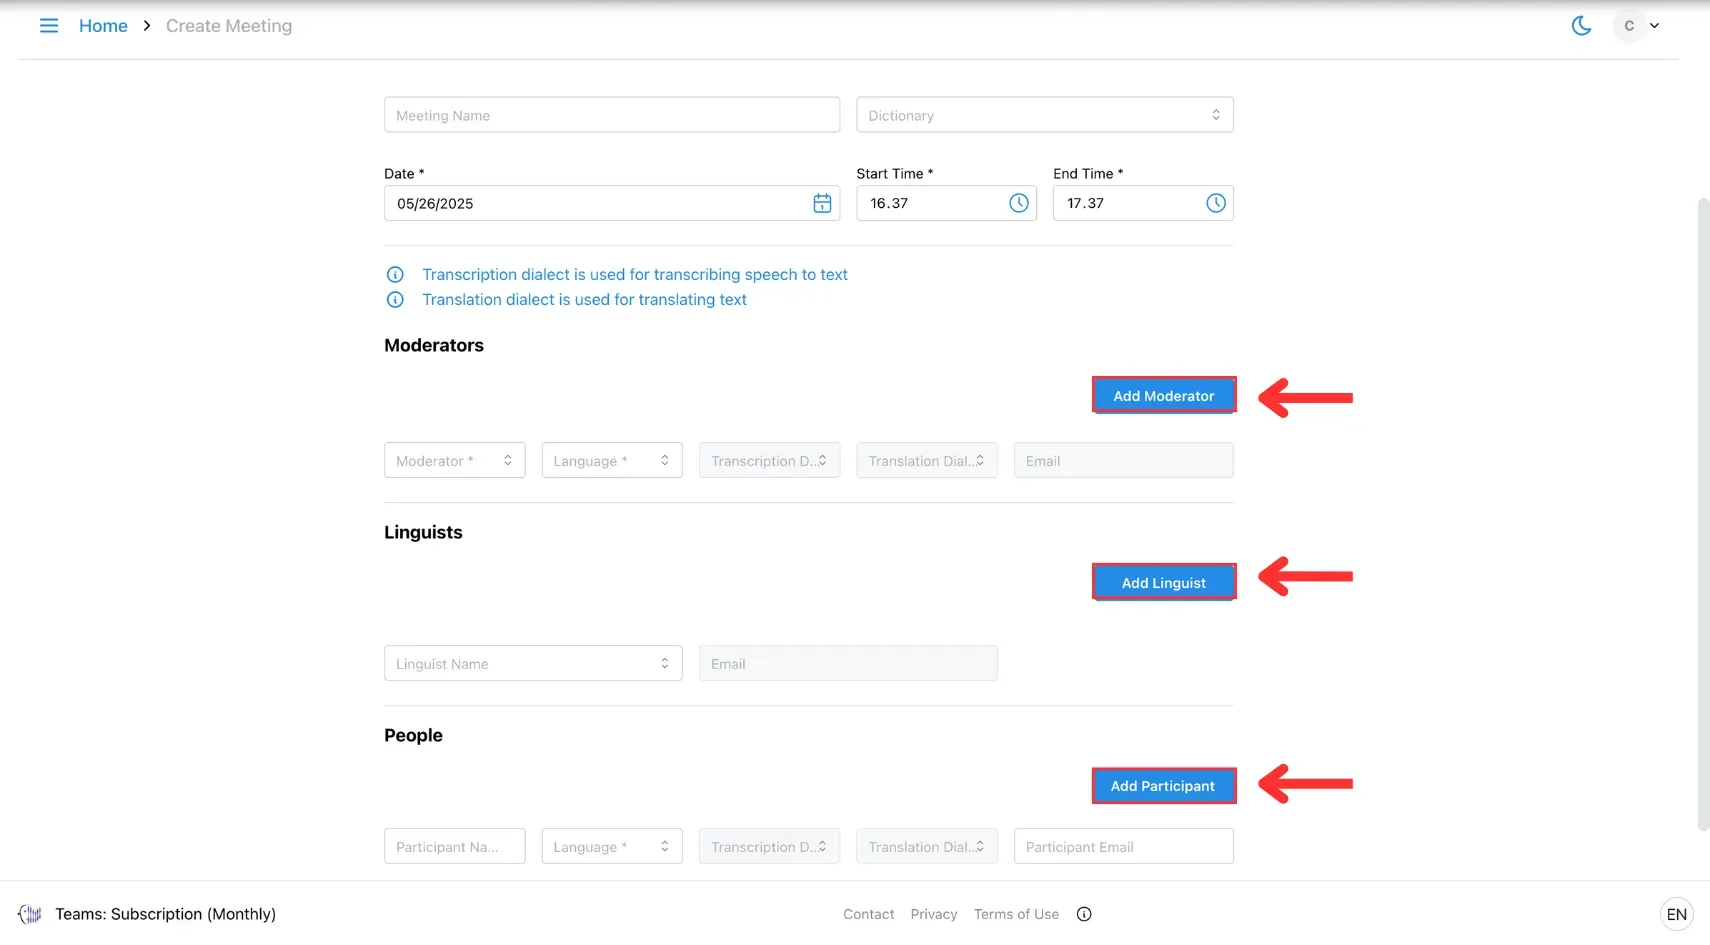
Click Add Moderator, Add Linguist, or Add Participant on the right side to add more users.
4. Submit
Click Submit to create the meeting.
5. Share the Meeting
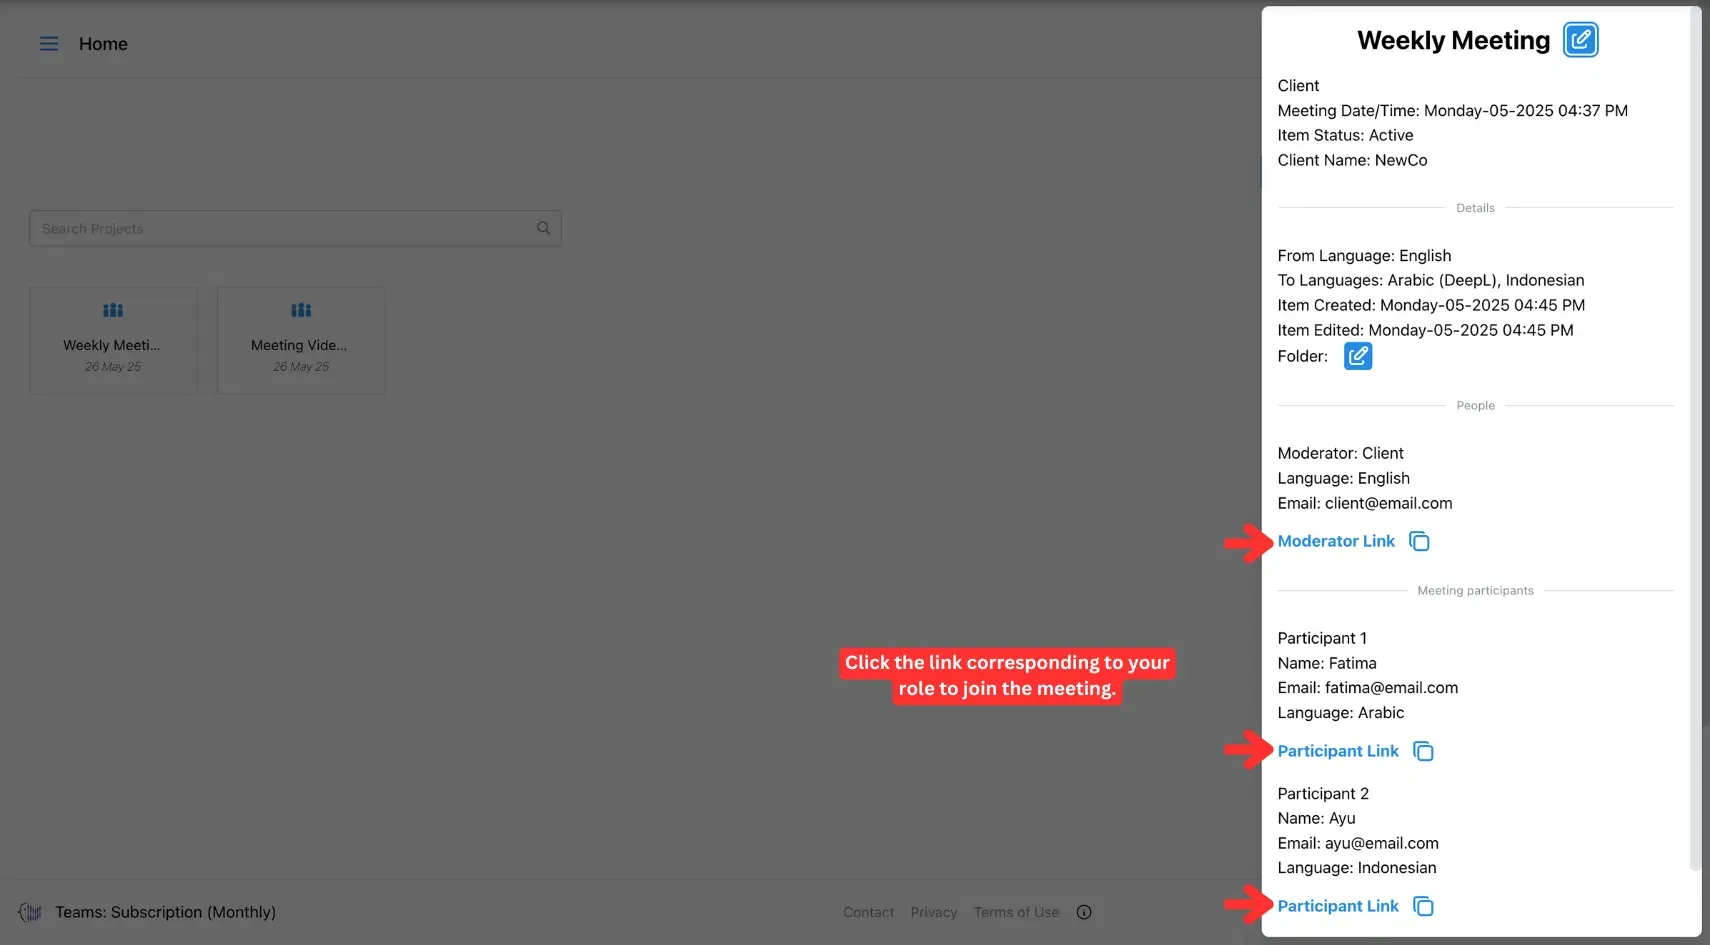
The meeting will appear on your homepage. Click the meeting to copy and share the link with participants.
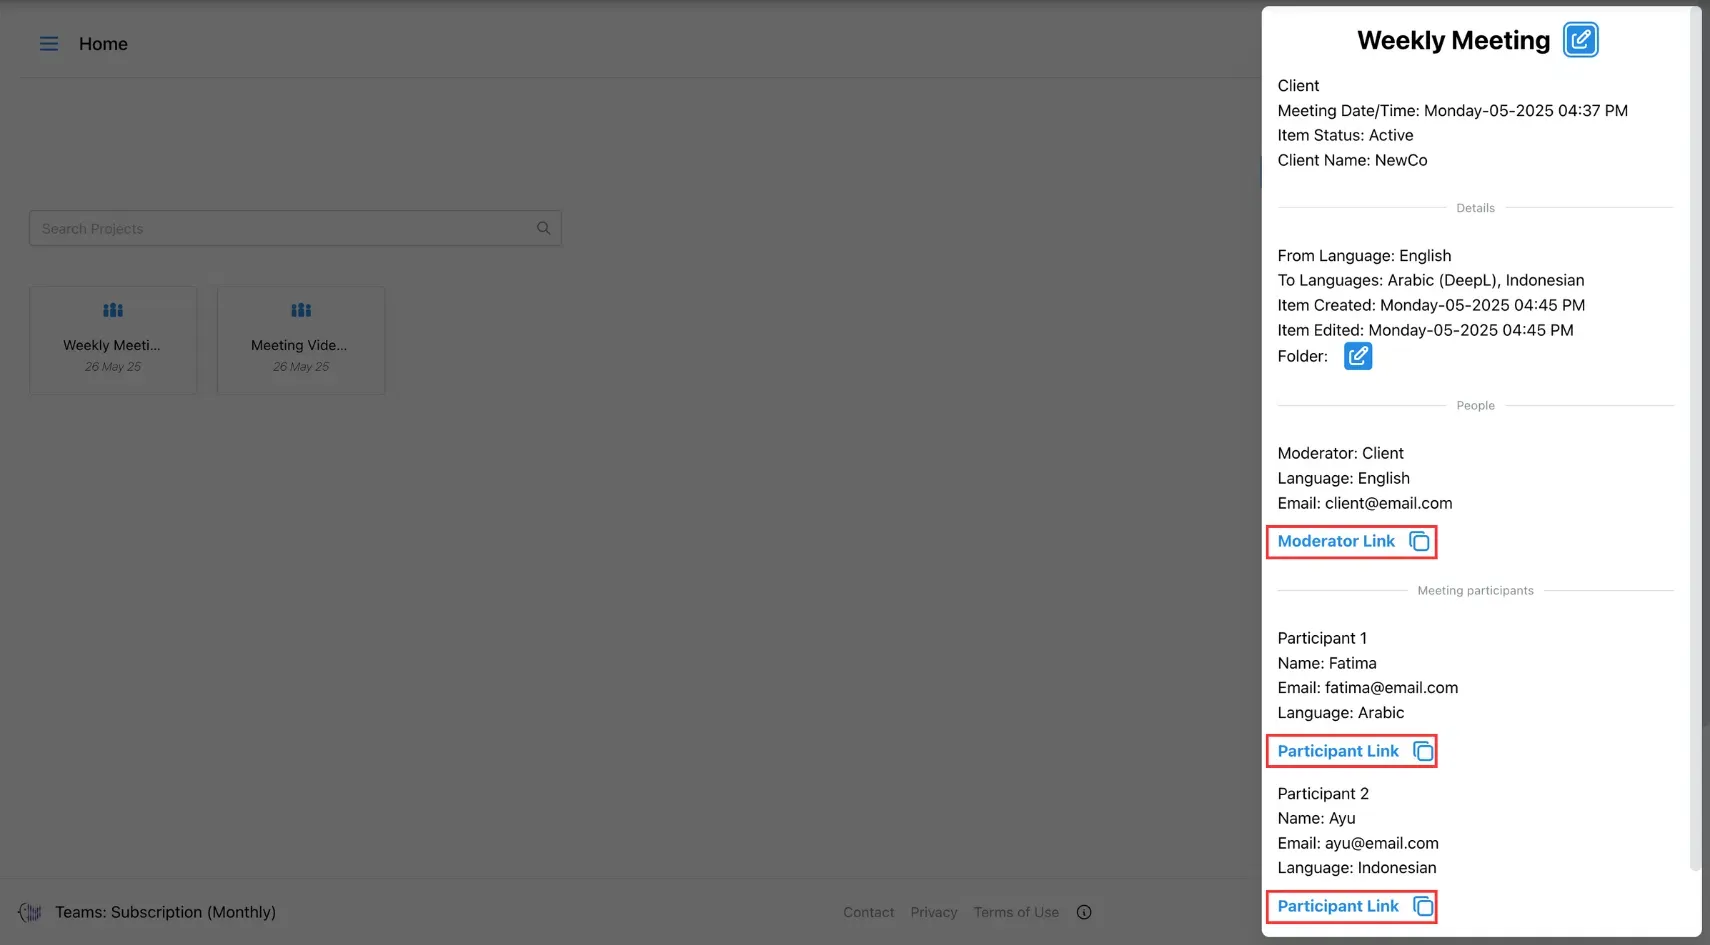
6. Join Meeting
At the scheduled time, open the meeting from your homepage, select the appropriate link based on your role, and click Join Meeting to begin.