8. How to Create a Folder
Learn how to create folders and organise your active meetings or text projects by assigning them to folders for easier access and team management.
You can organise your meetings and text translation projects by grouping them into folders.
To create a folder:
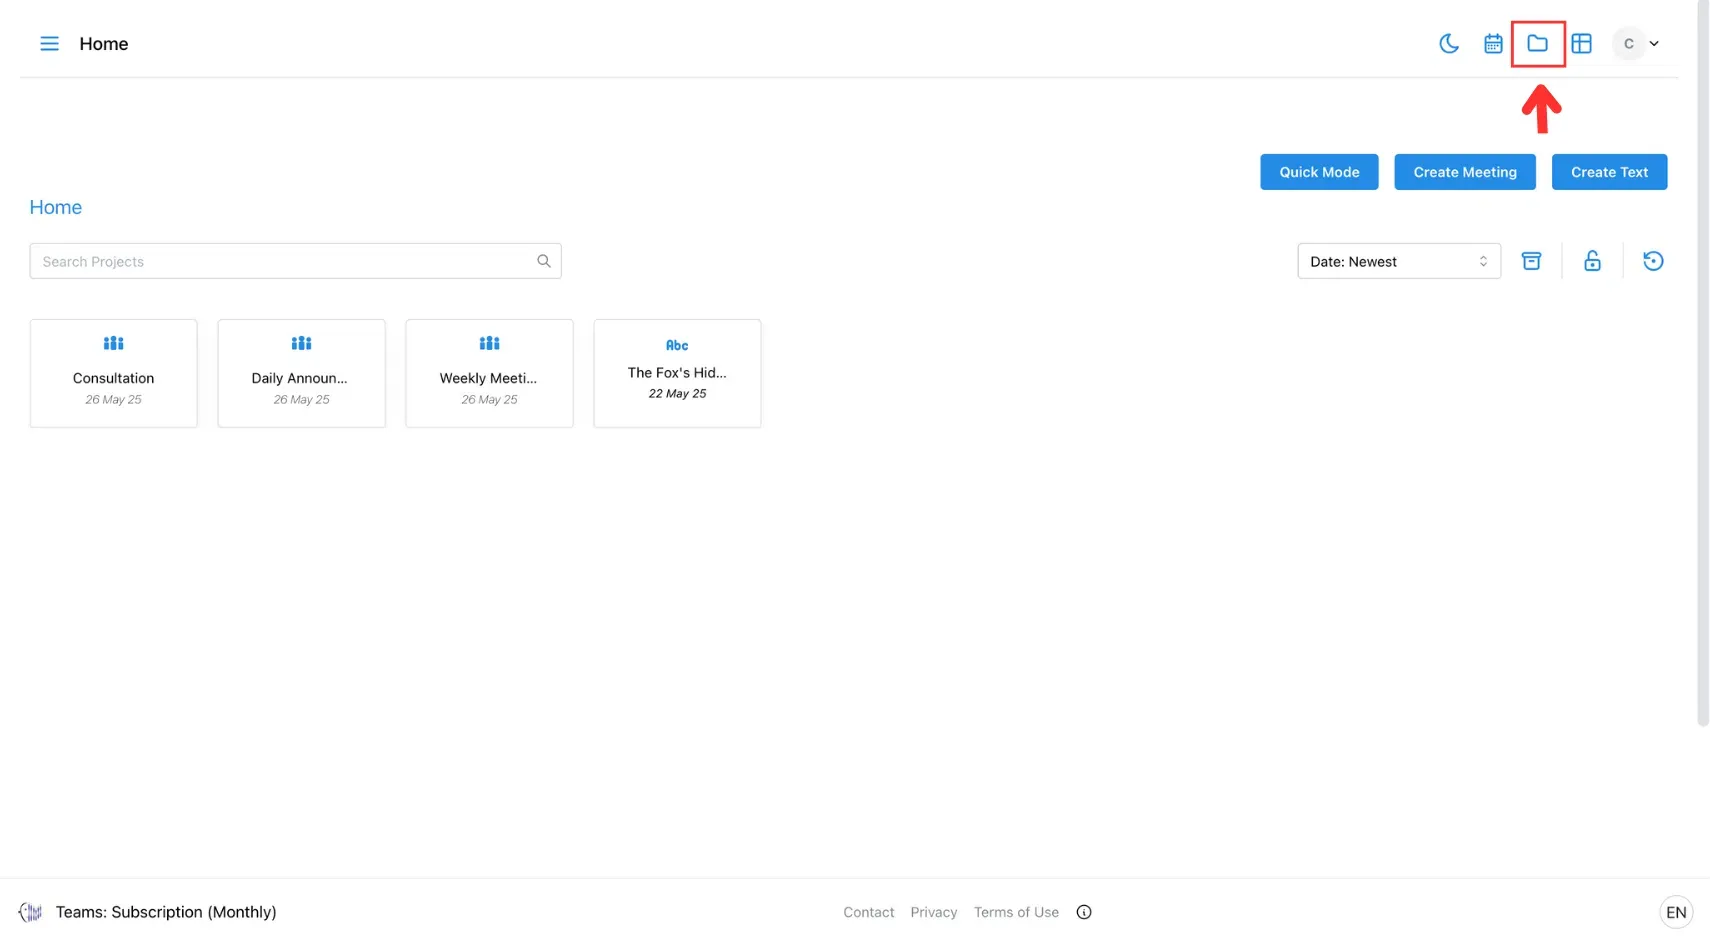
Step 1: Click the Folder Icon
At the top right of the screen, click the folder icon to open the folder panel.
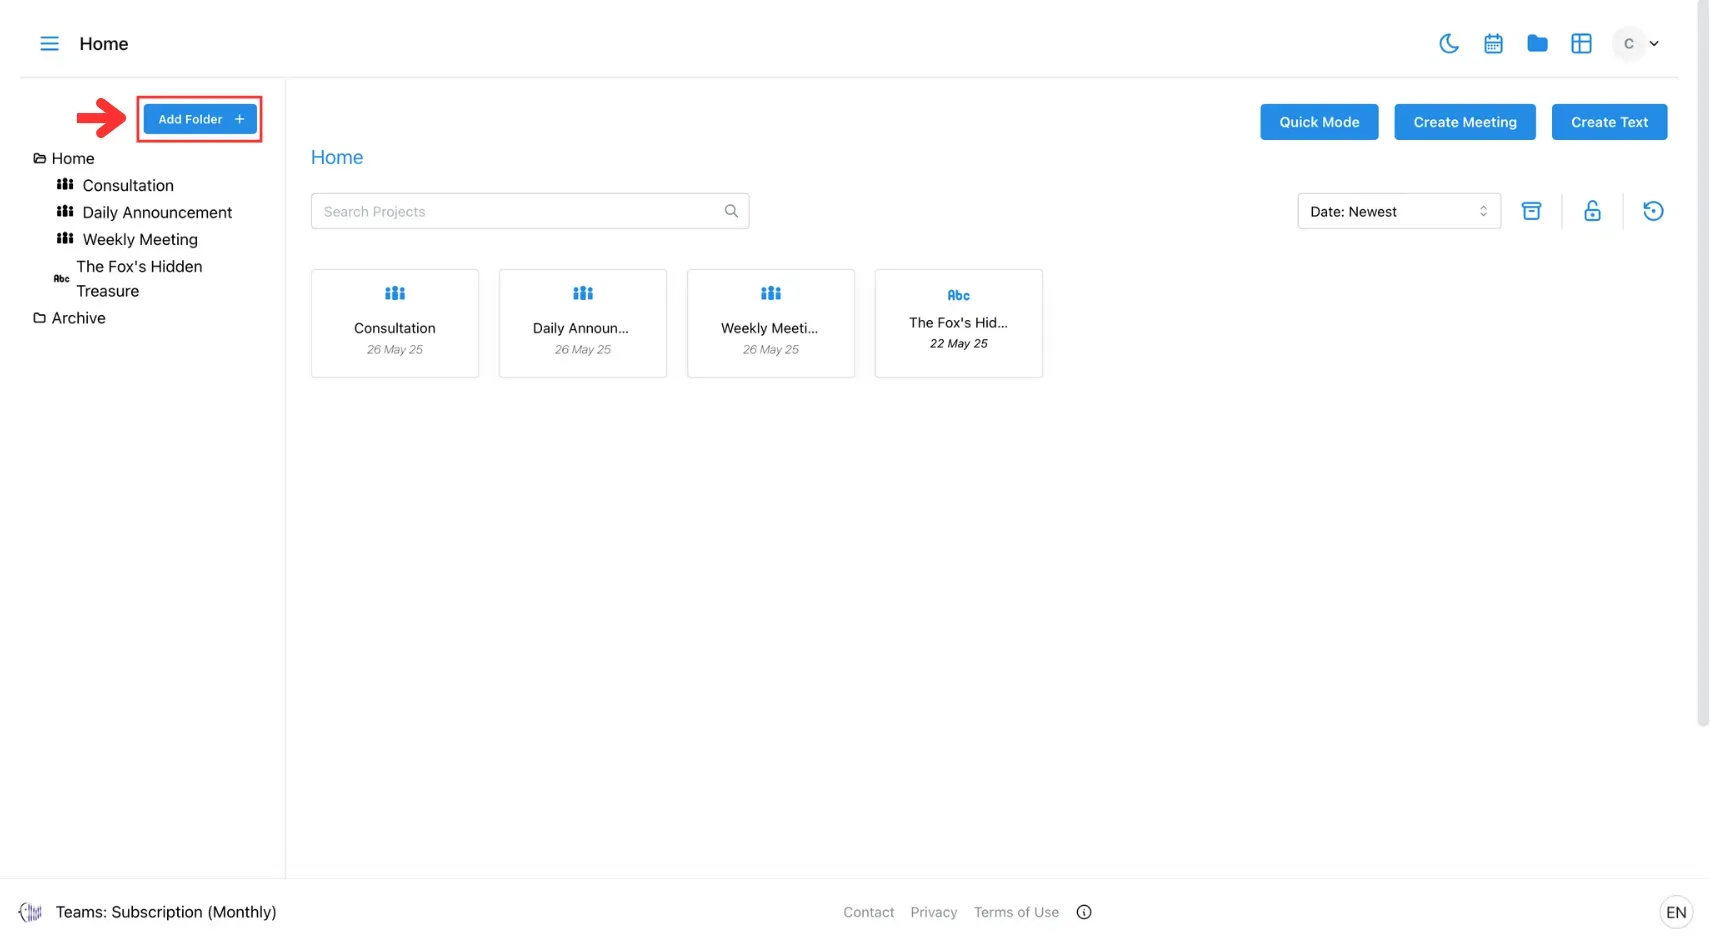
Step 2: Add a New Folder
In the left panel, click the Add Folder button.
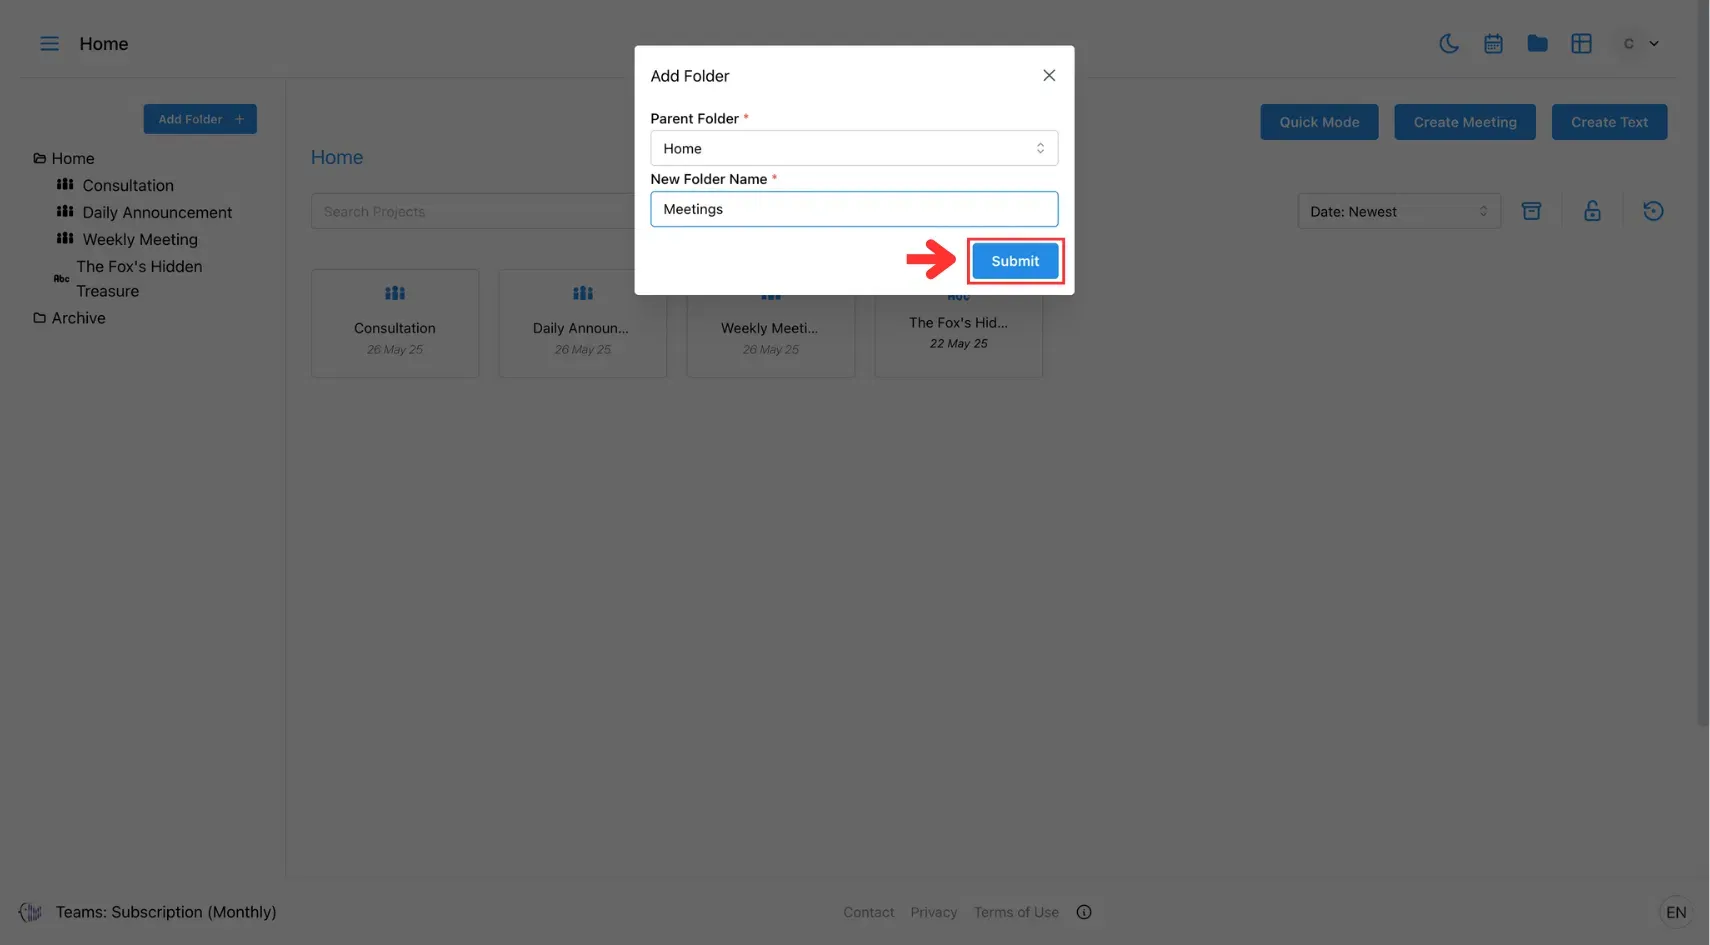
Step 3: Name Your Folder
Choose a parent folder, then enter a name for your new folder.
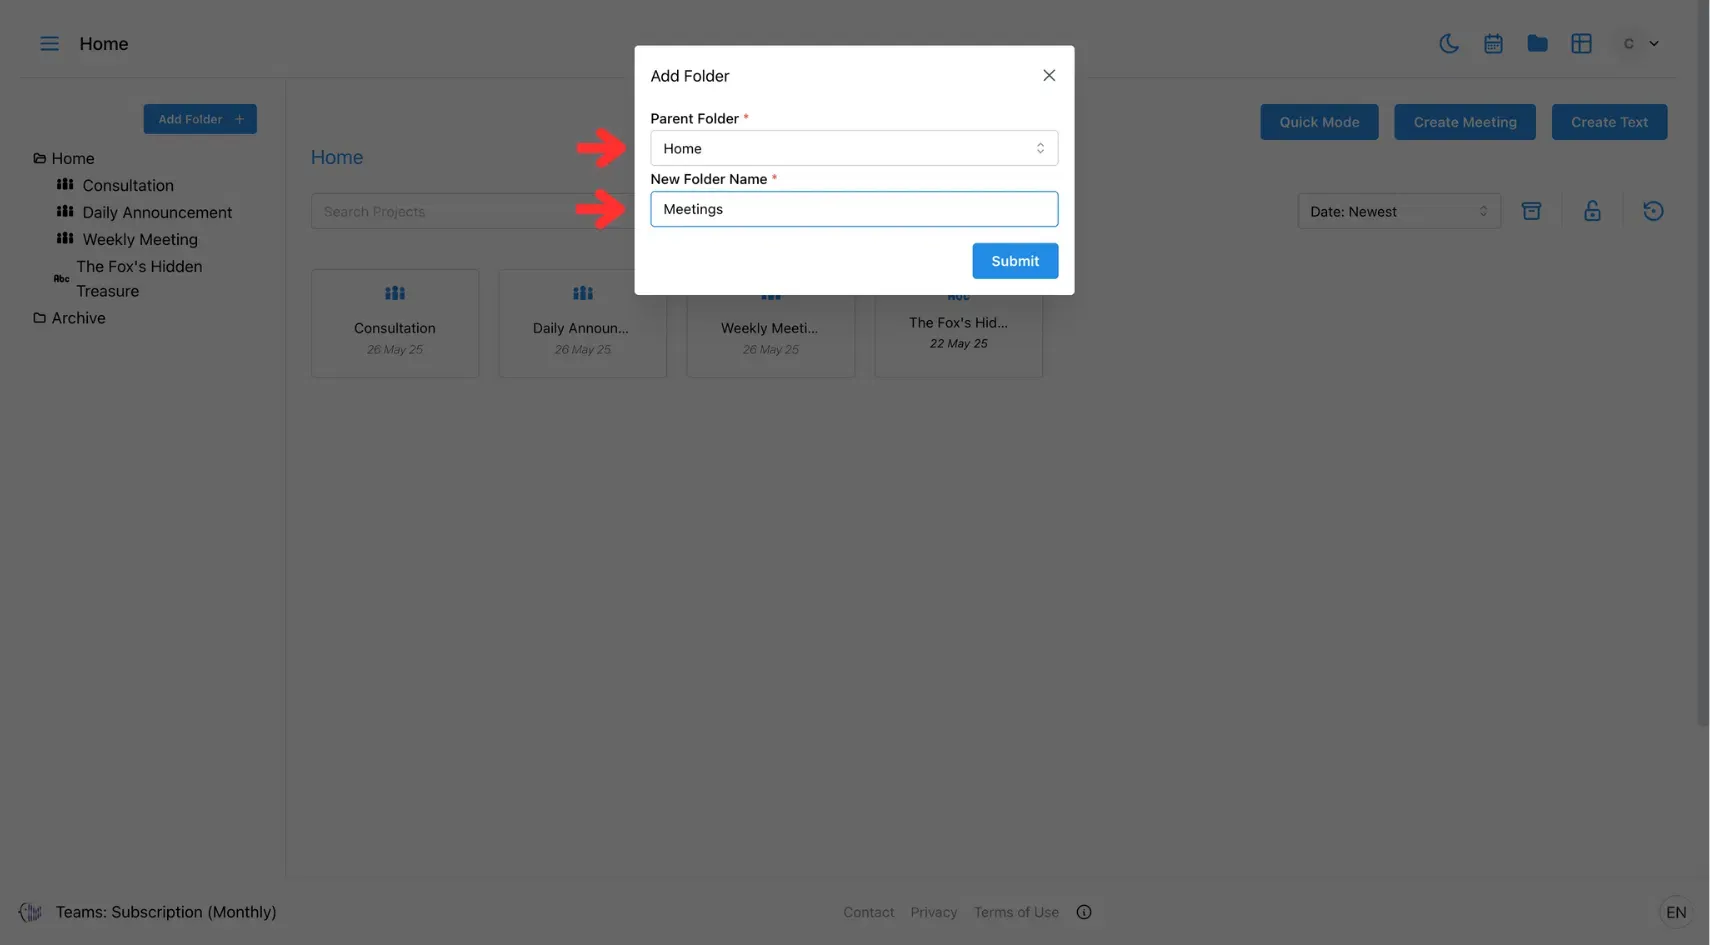
Step 4: Submit
Click Submit, and your new folder will appear in the left panel under the folder icon.
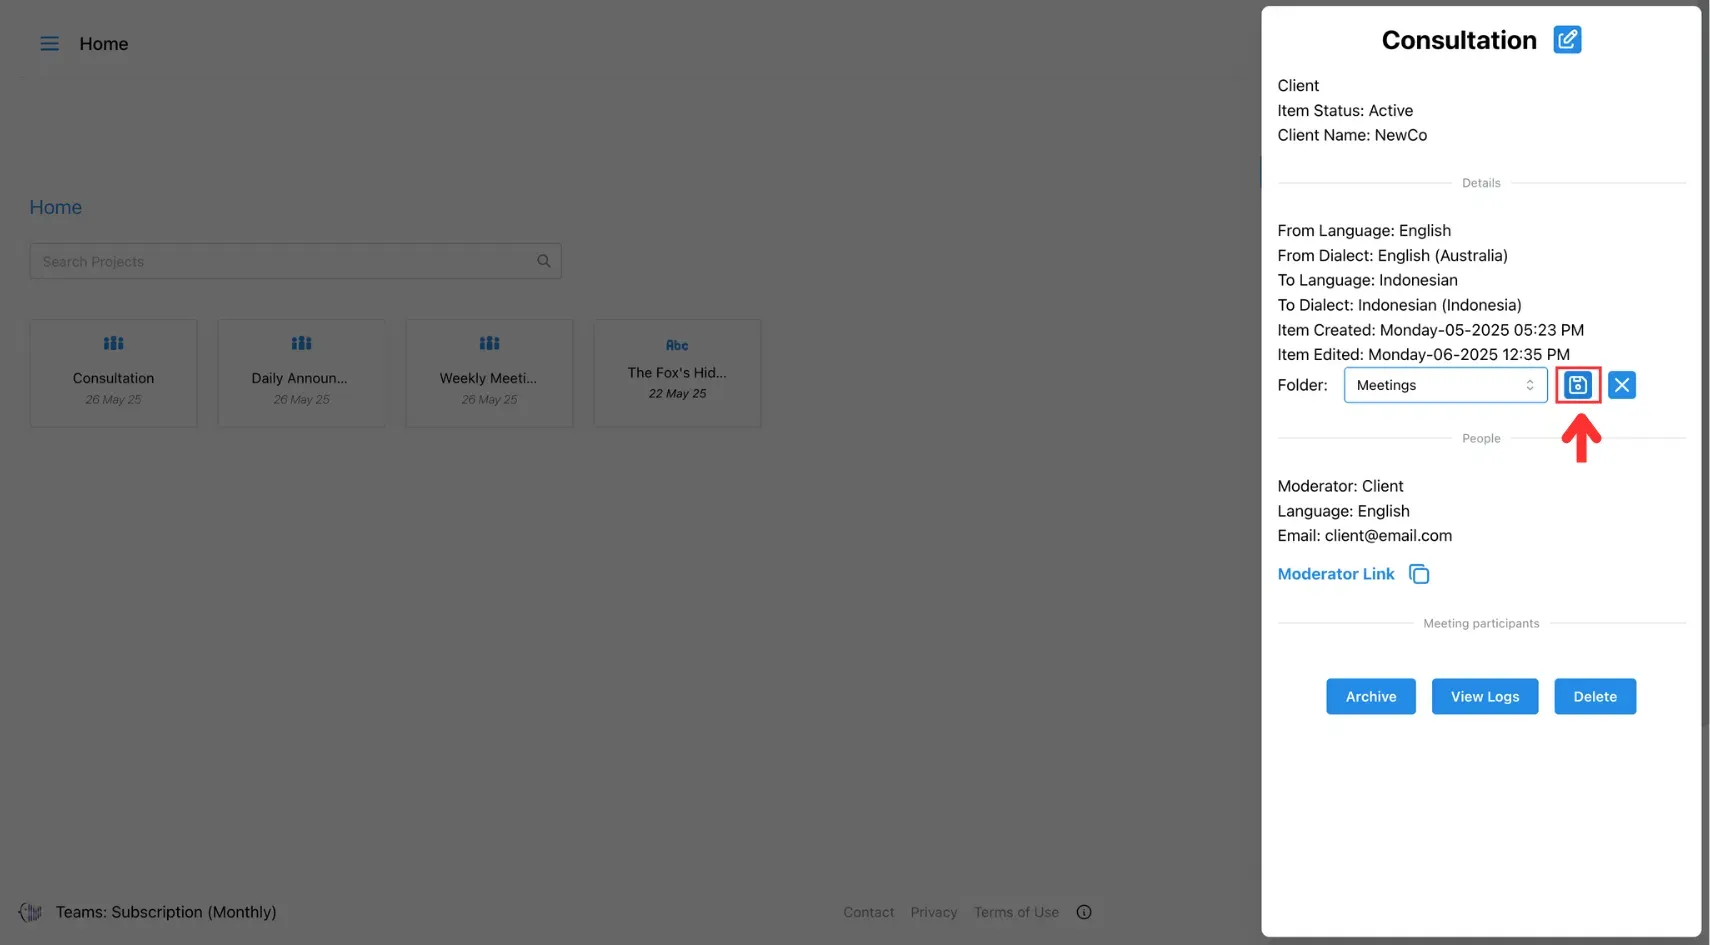
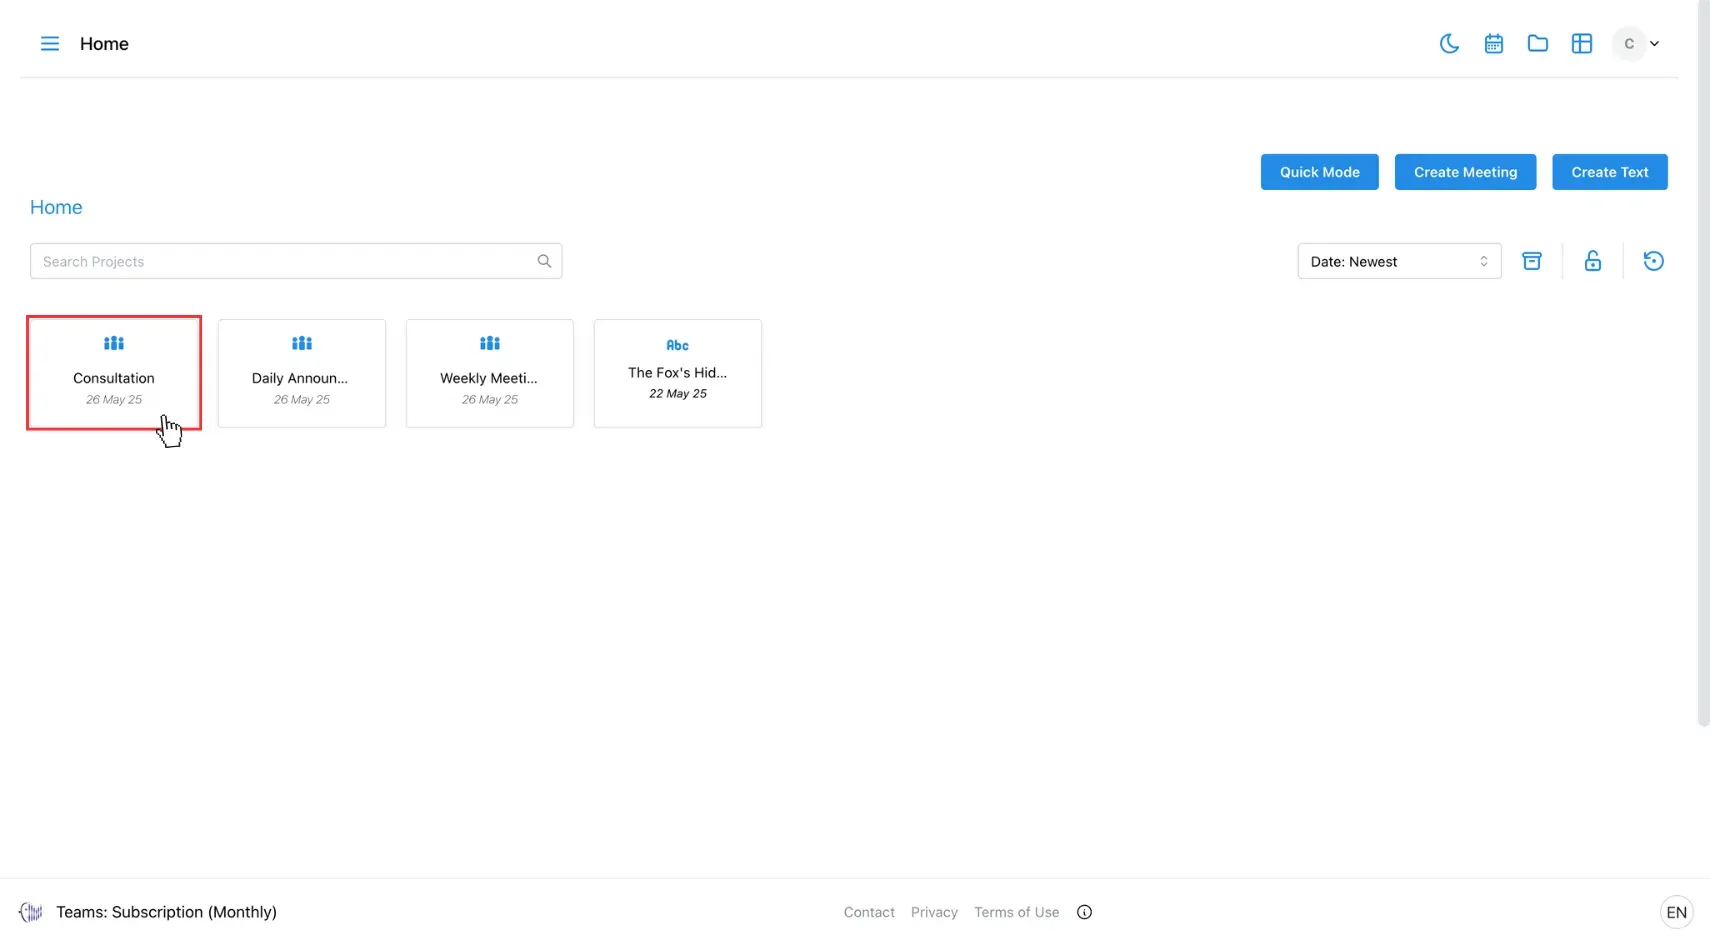
To assign an existing meeting or text translation project to a folder:
Step 1: Select the Project
Click on the meeting or text translation you want to move.
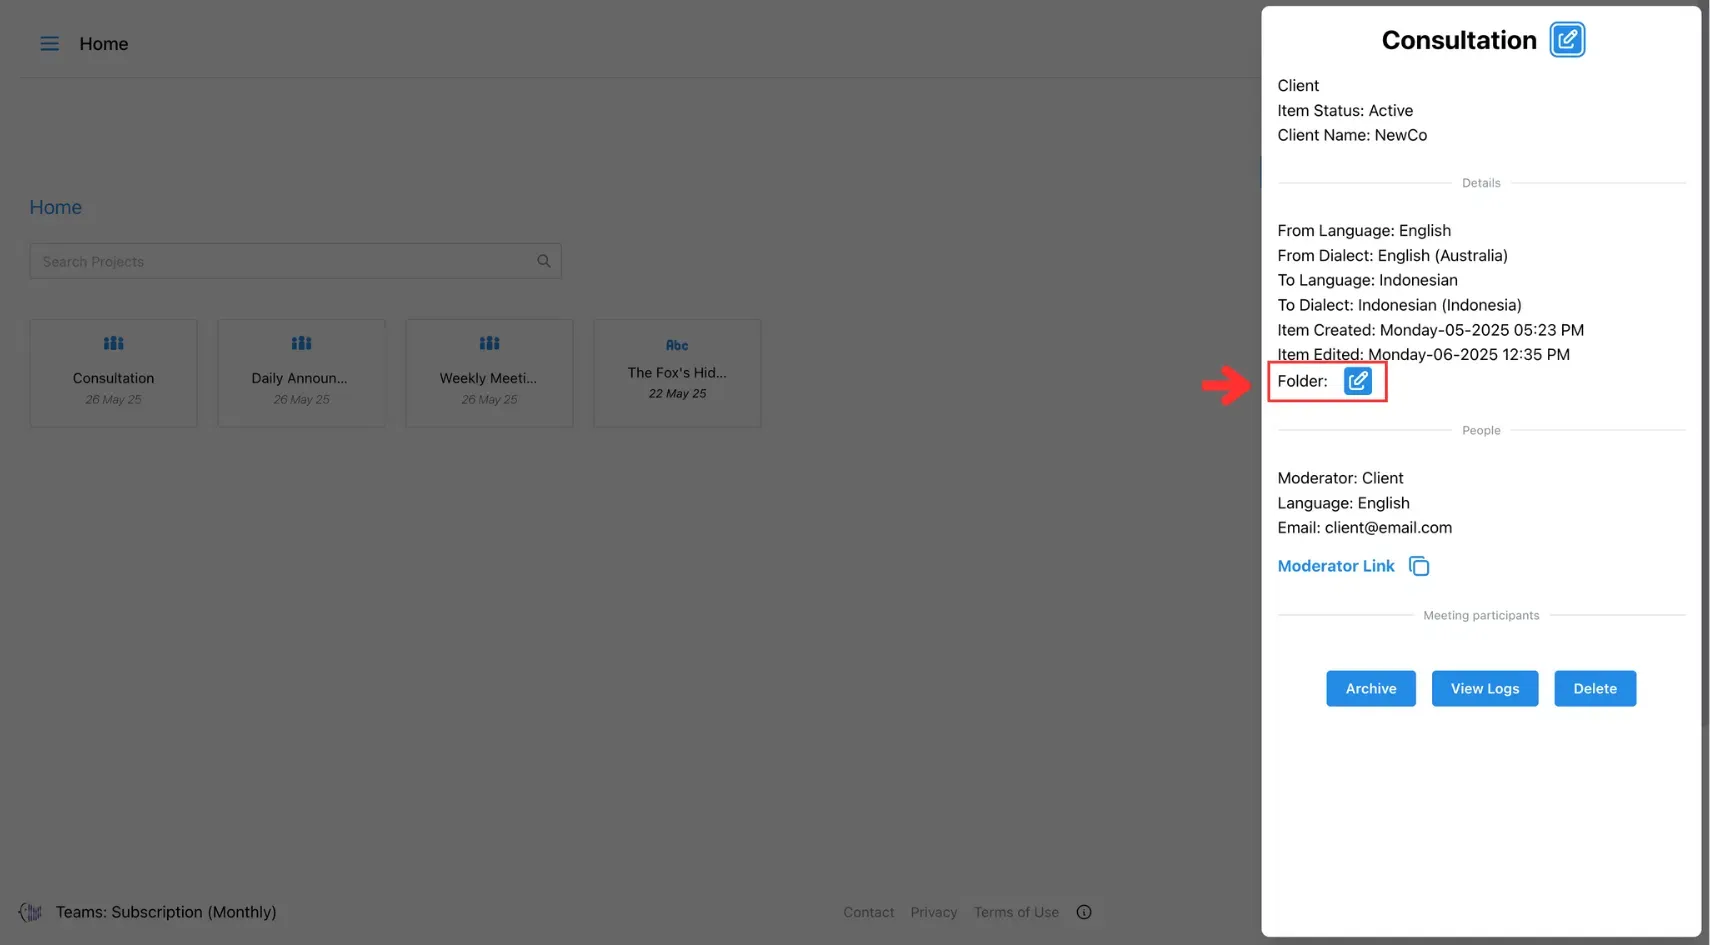
Step 2: Open the Folder Settings
Hover over the Folder field and click the Edit button.
Step 3: Choose a Folder
From the dropdown, select the folder where you want to place the project.
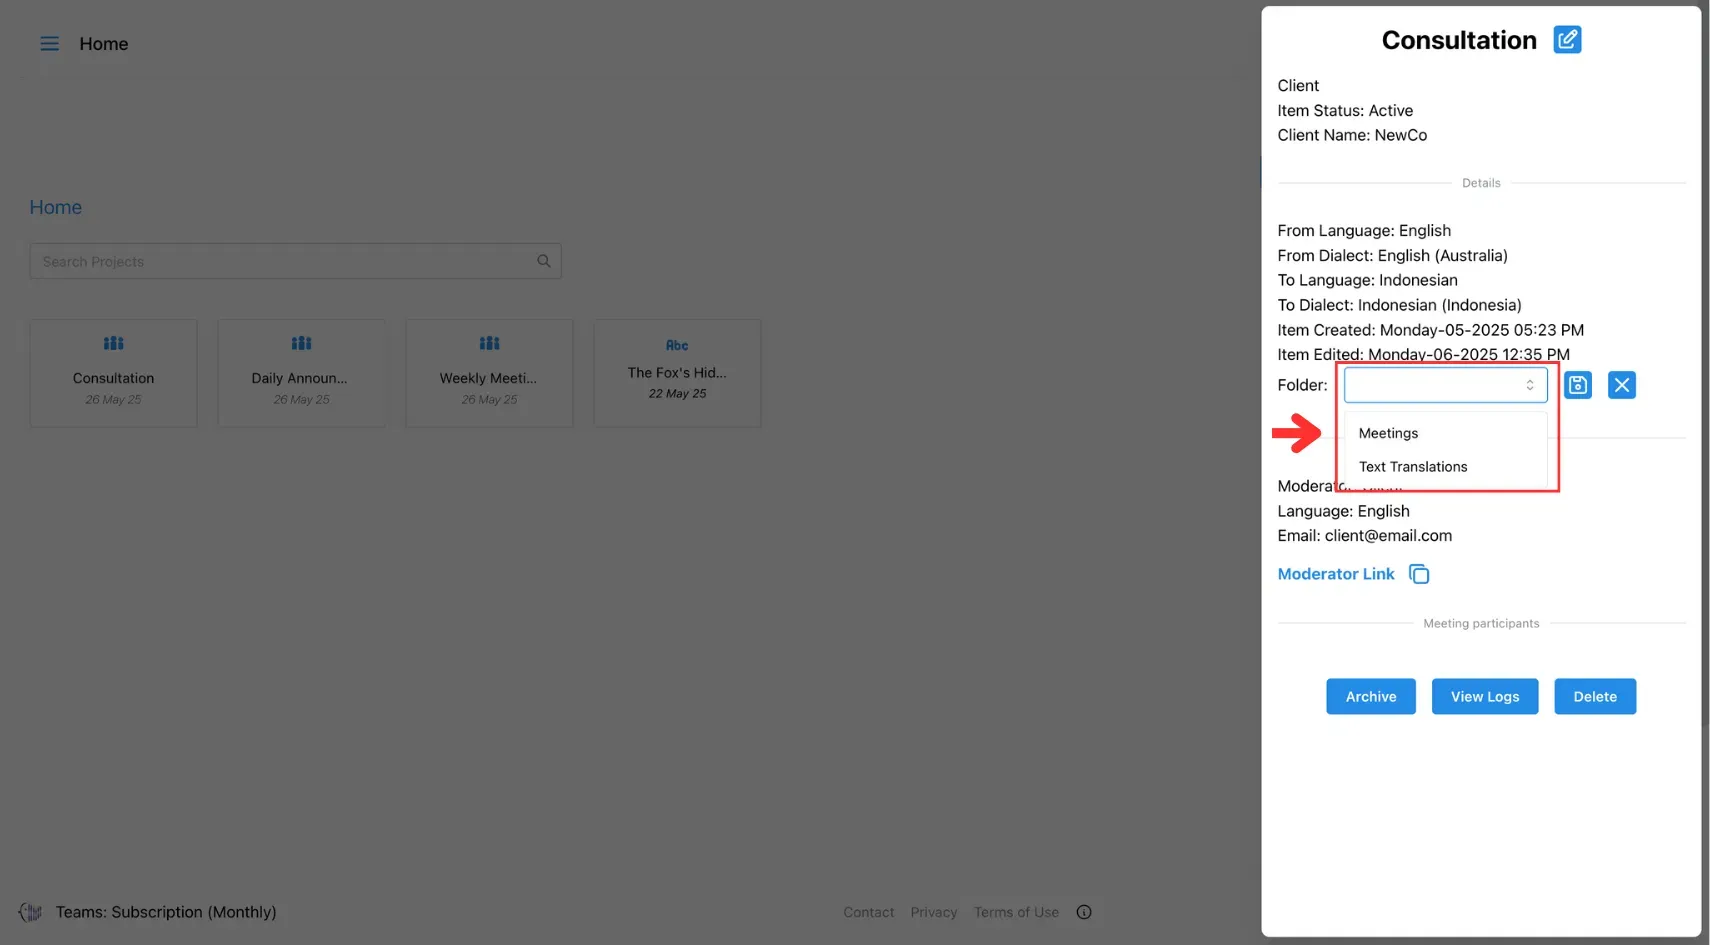
Step 4: Save Changes
Click Save to apply the changes.