7. How to Add Language
This page explains how to add new languages to your meeting or translation project. It covers selecting from supported languages and configuring preferences to ensure accurate, real-time multilingual communication.
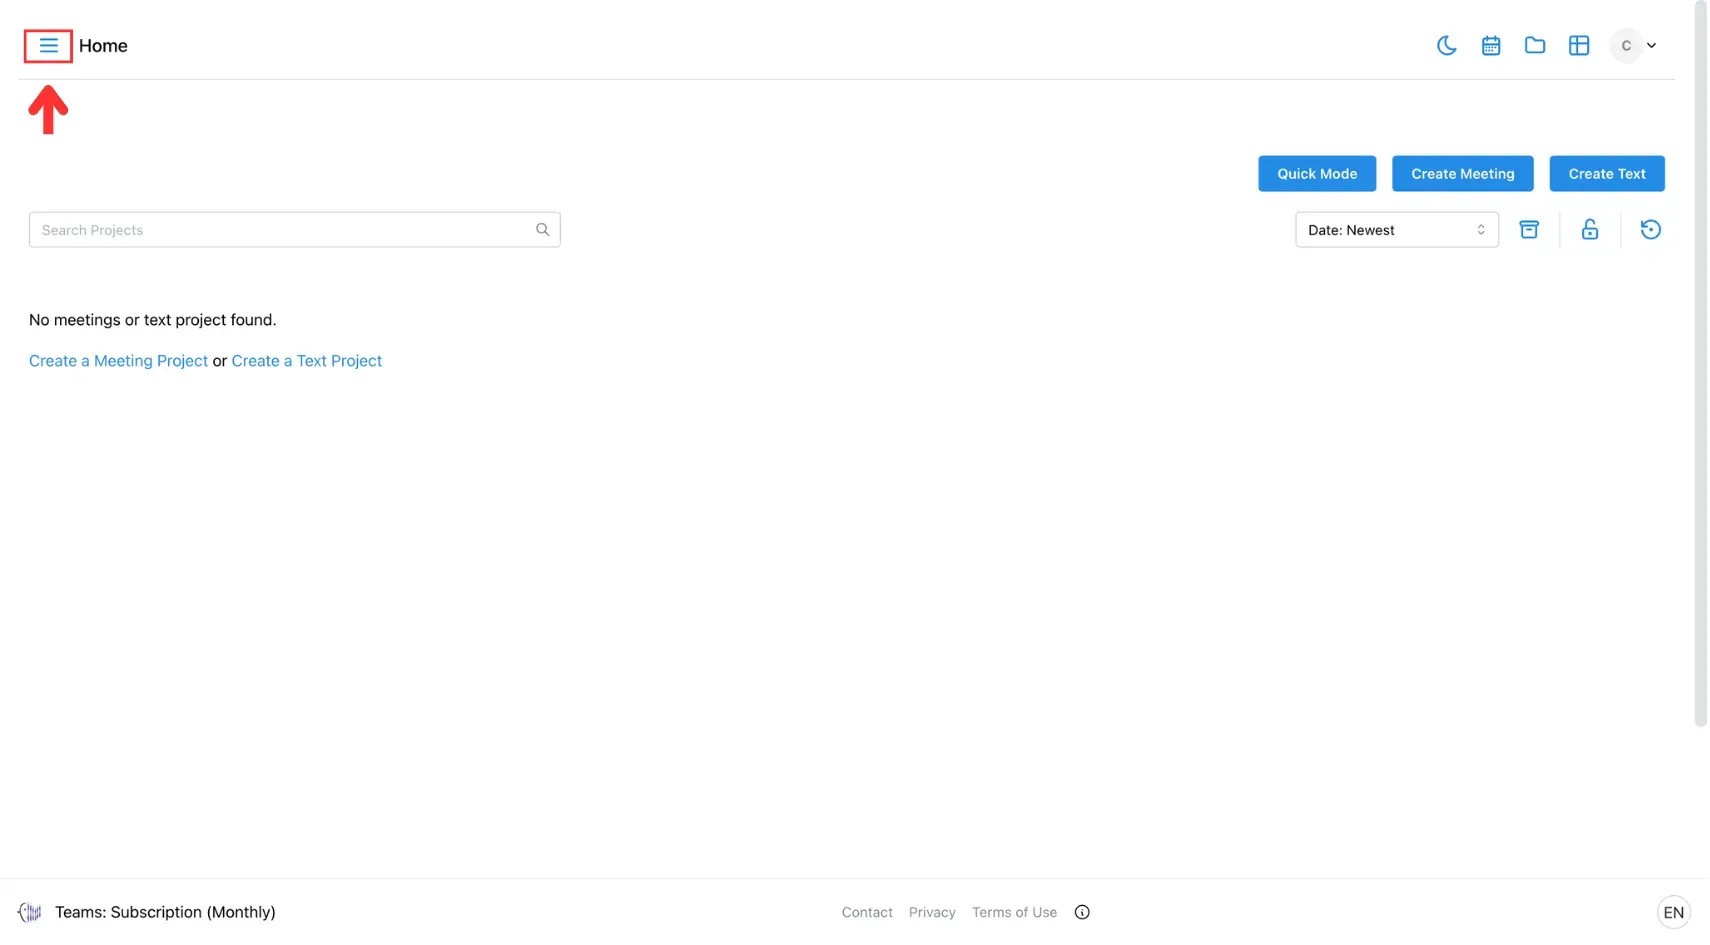
Step 1: Open the Admin Menu
Click the three horizontal lines icon in the top-left corner of the screen.
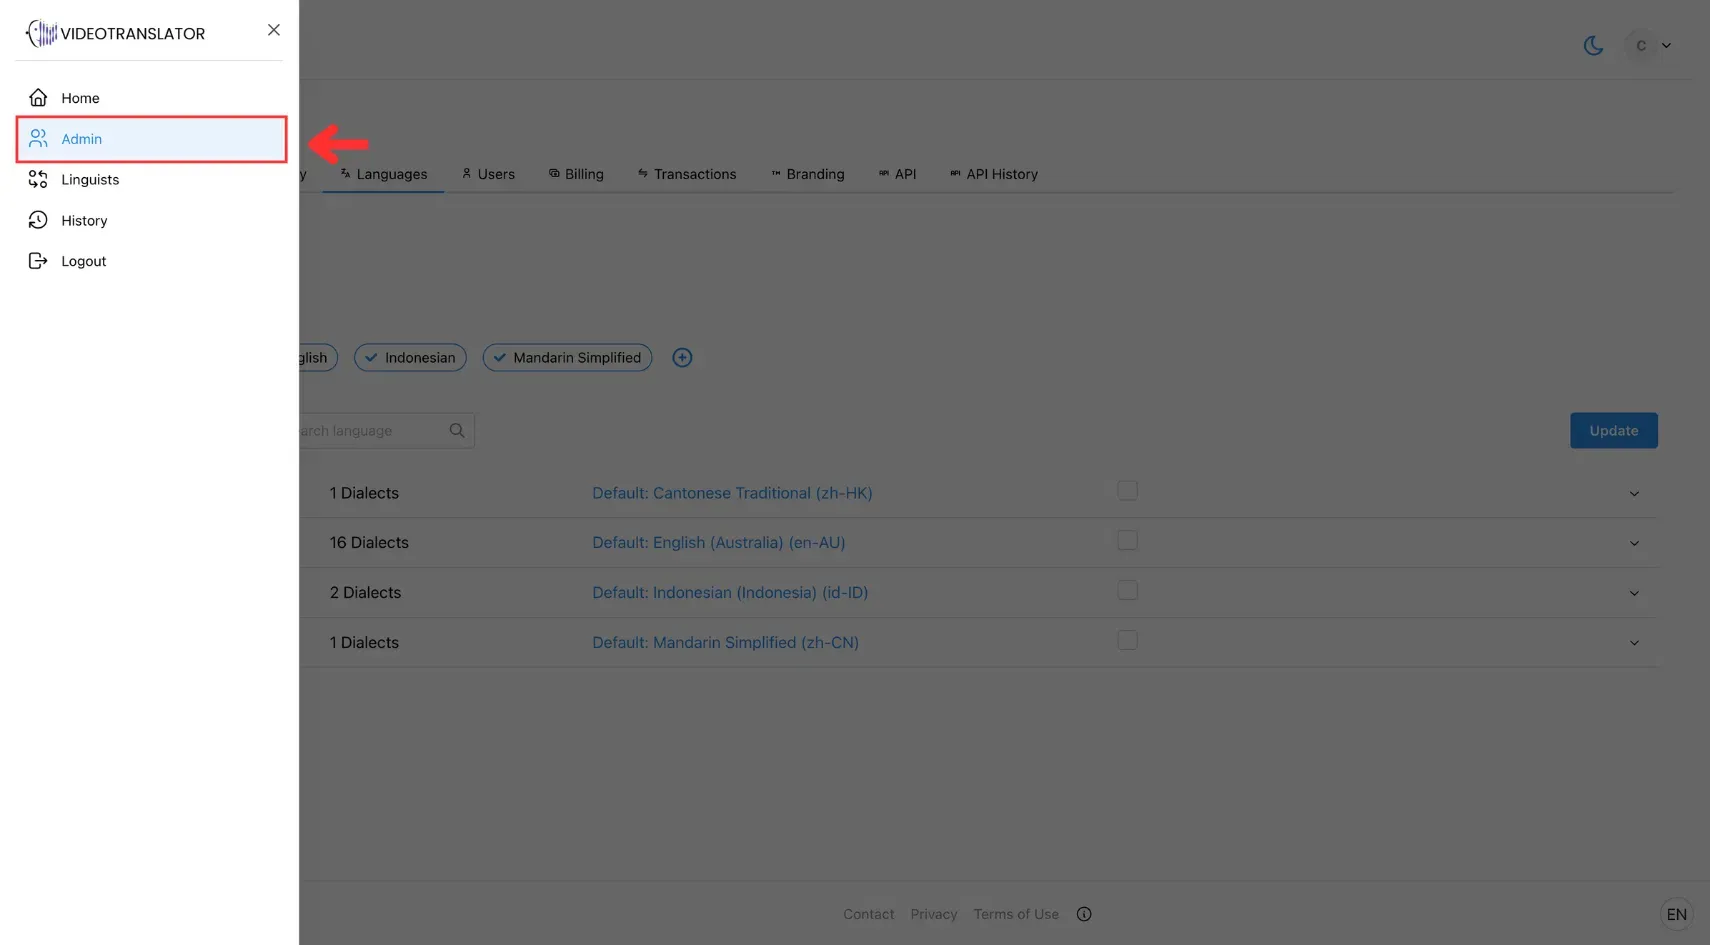
After that, select Admin from the side menu
Step 2: Go to the Language Tab
In the Admin panel, click the Language tab.

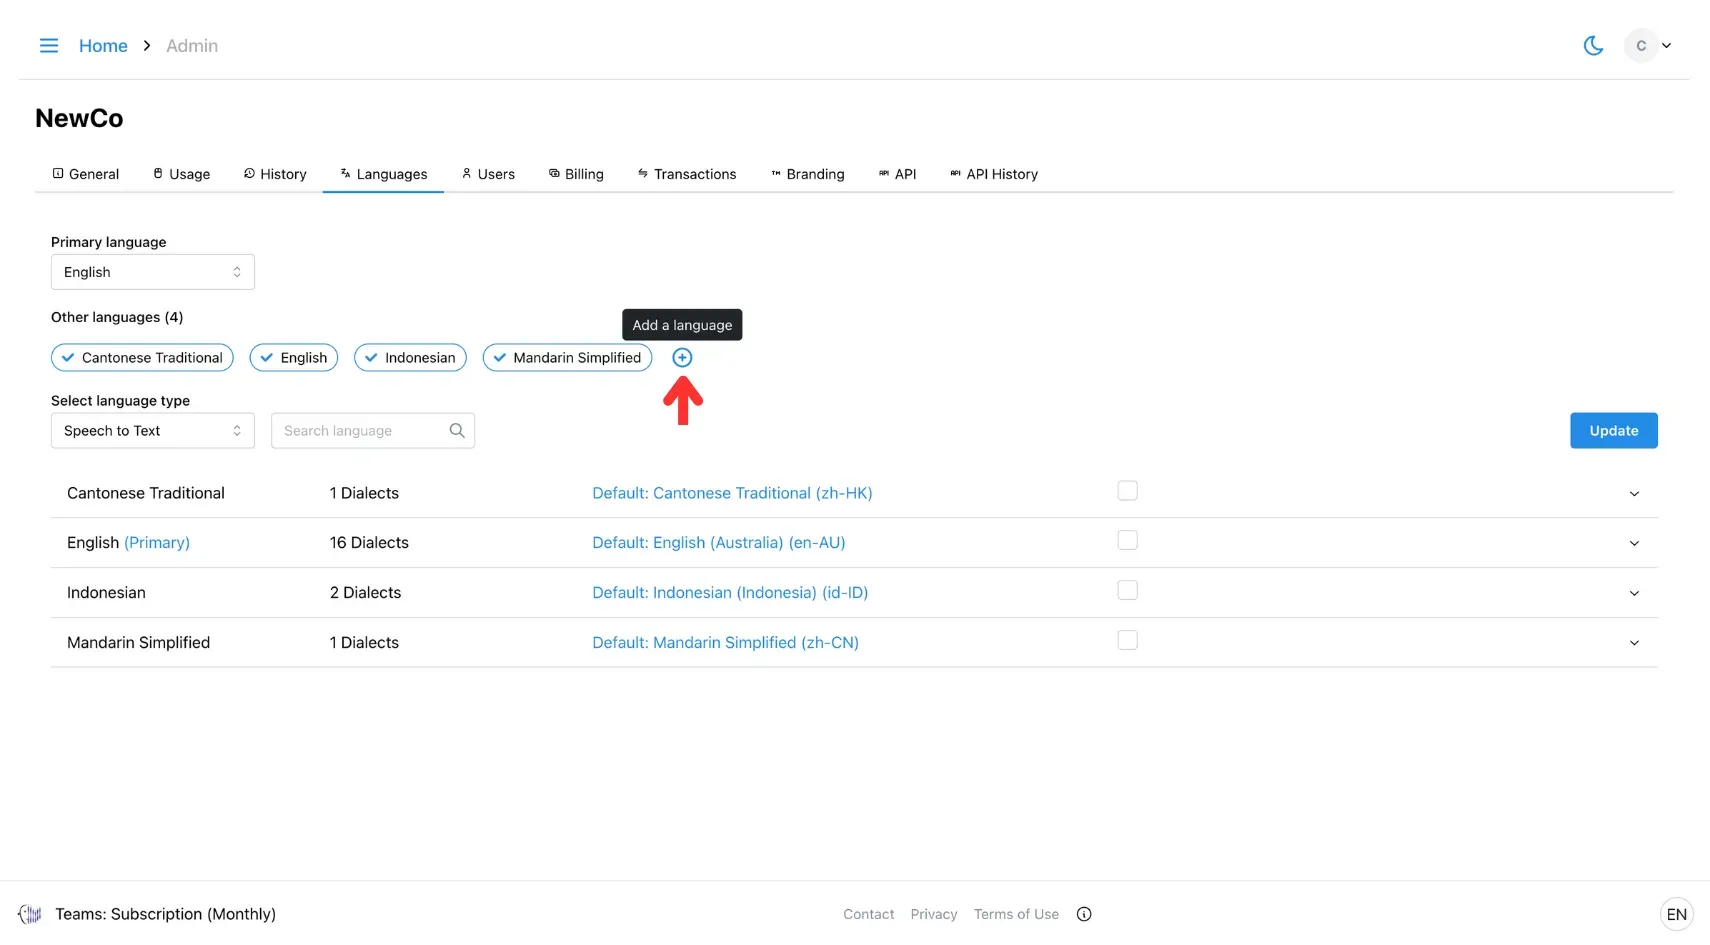
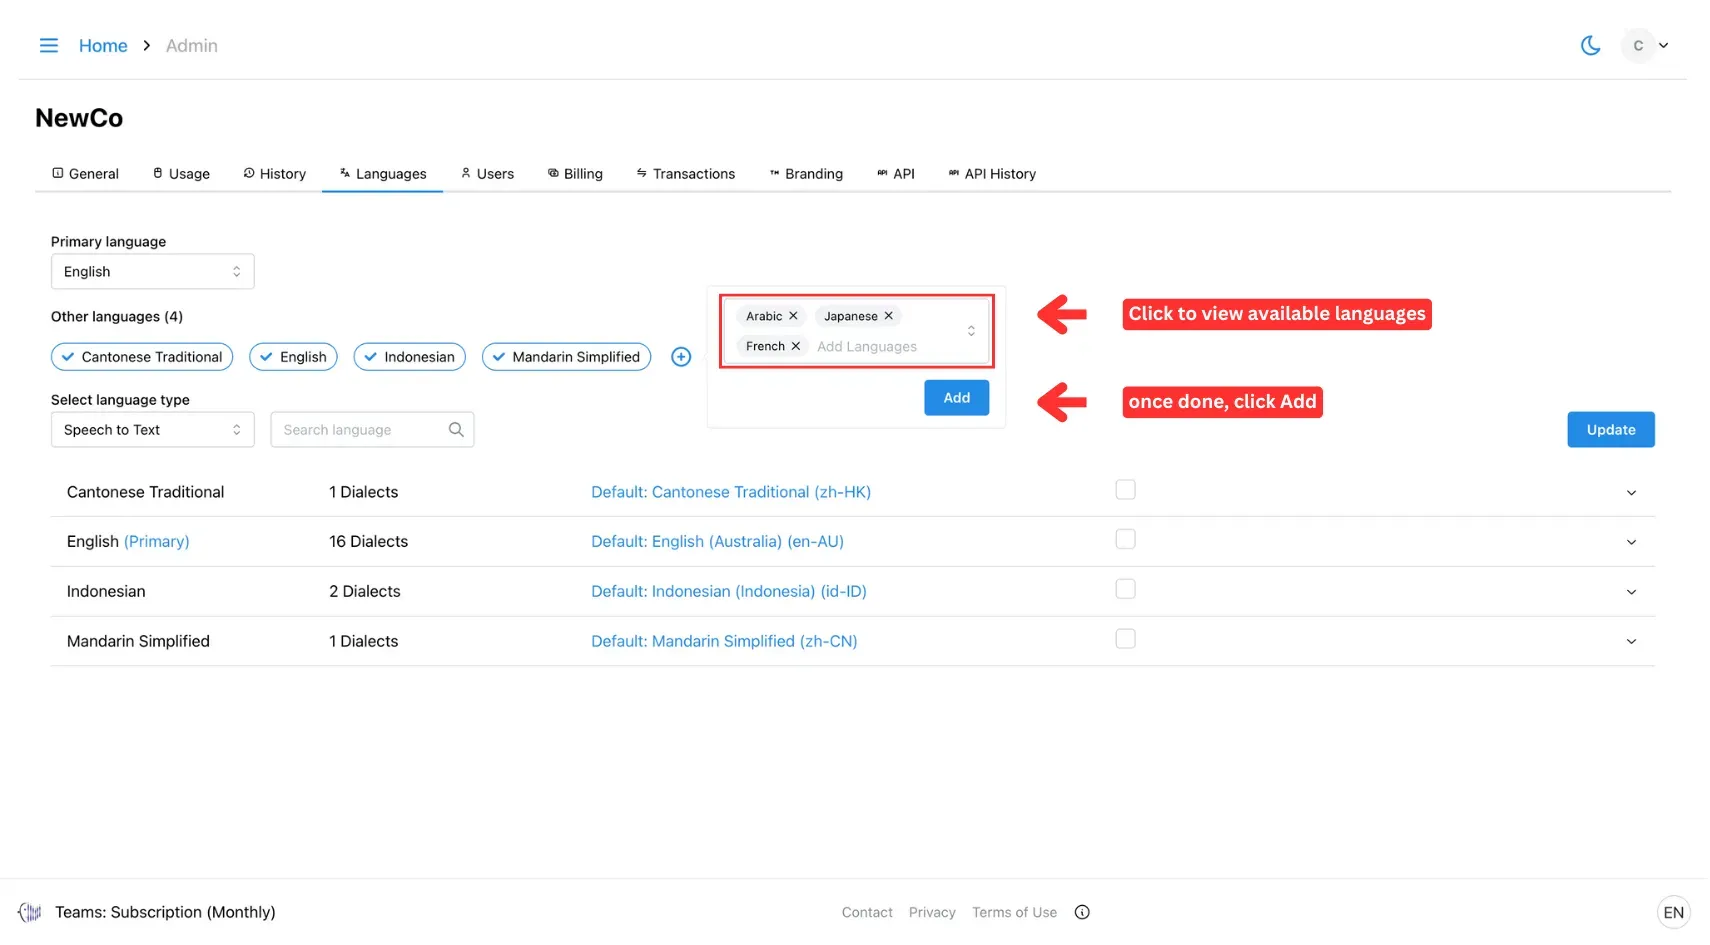
Step 3: Add a New Language
Click the (+) button to open the language selection window.
Step 4: Select Language(s) to Add
Choose the language(s) you want to add from the list, then click Add.
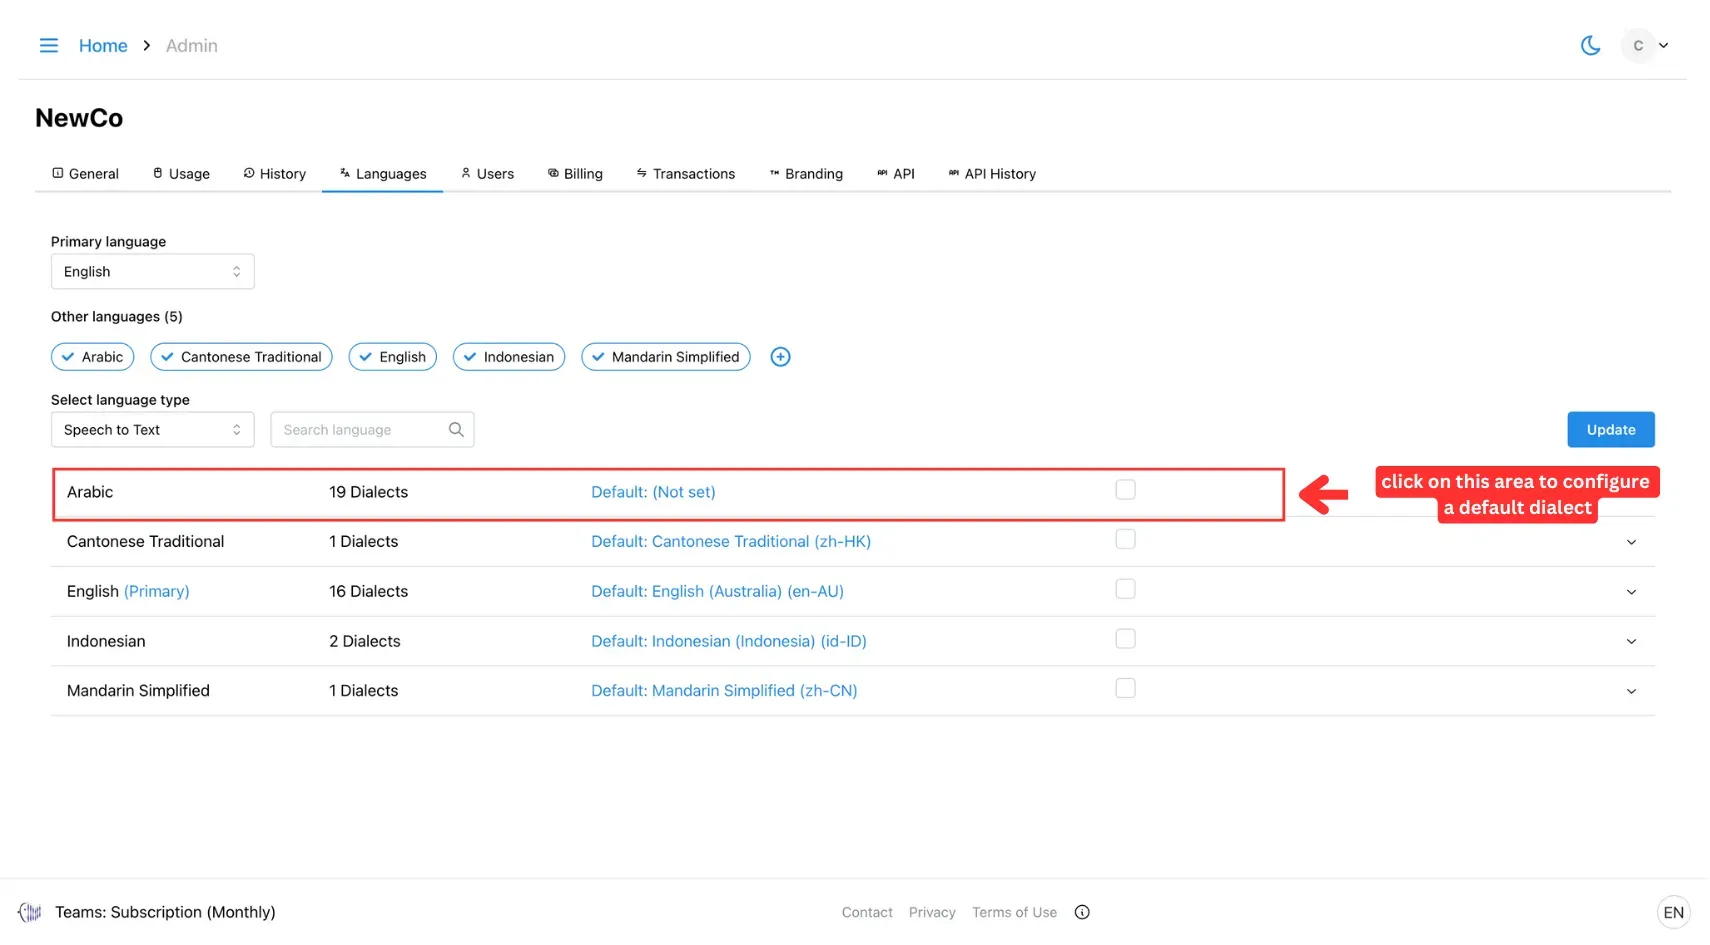
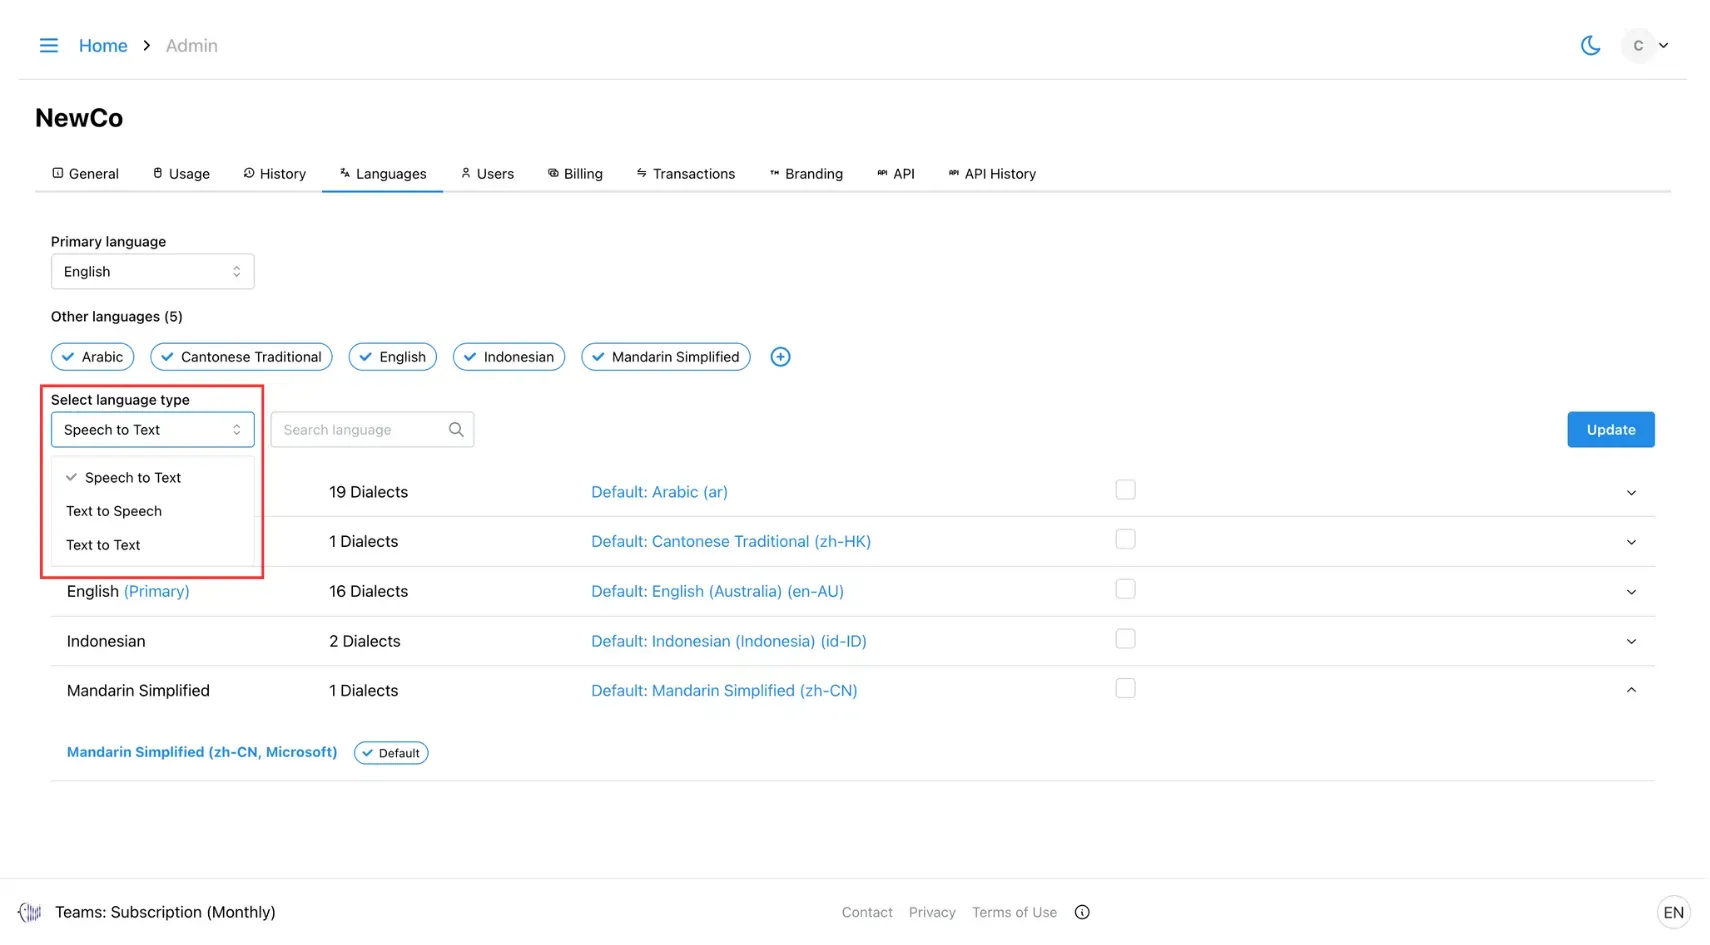
Step 5: Set Default Dialects
After adding a language, click on it to configure the default dialect for:
- Speech to Text
- Text to Text
- Text to Speech
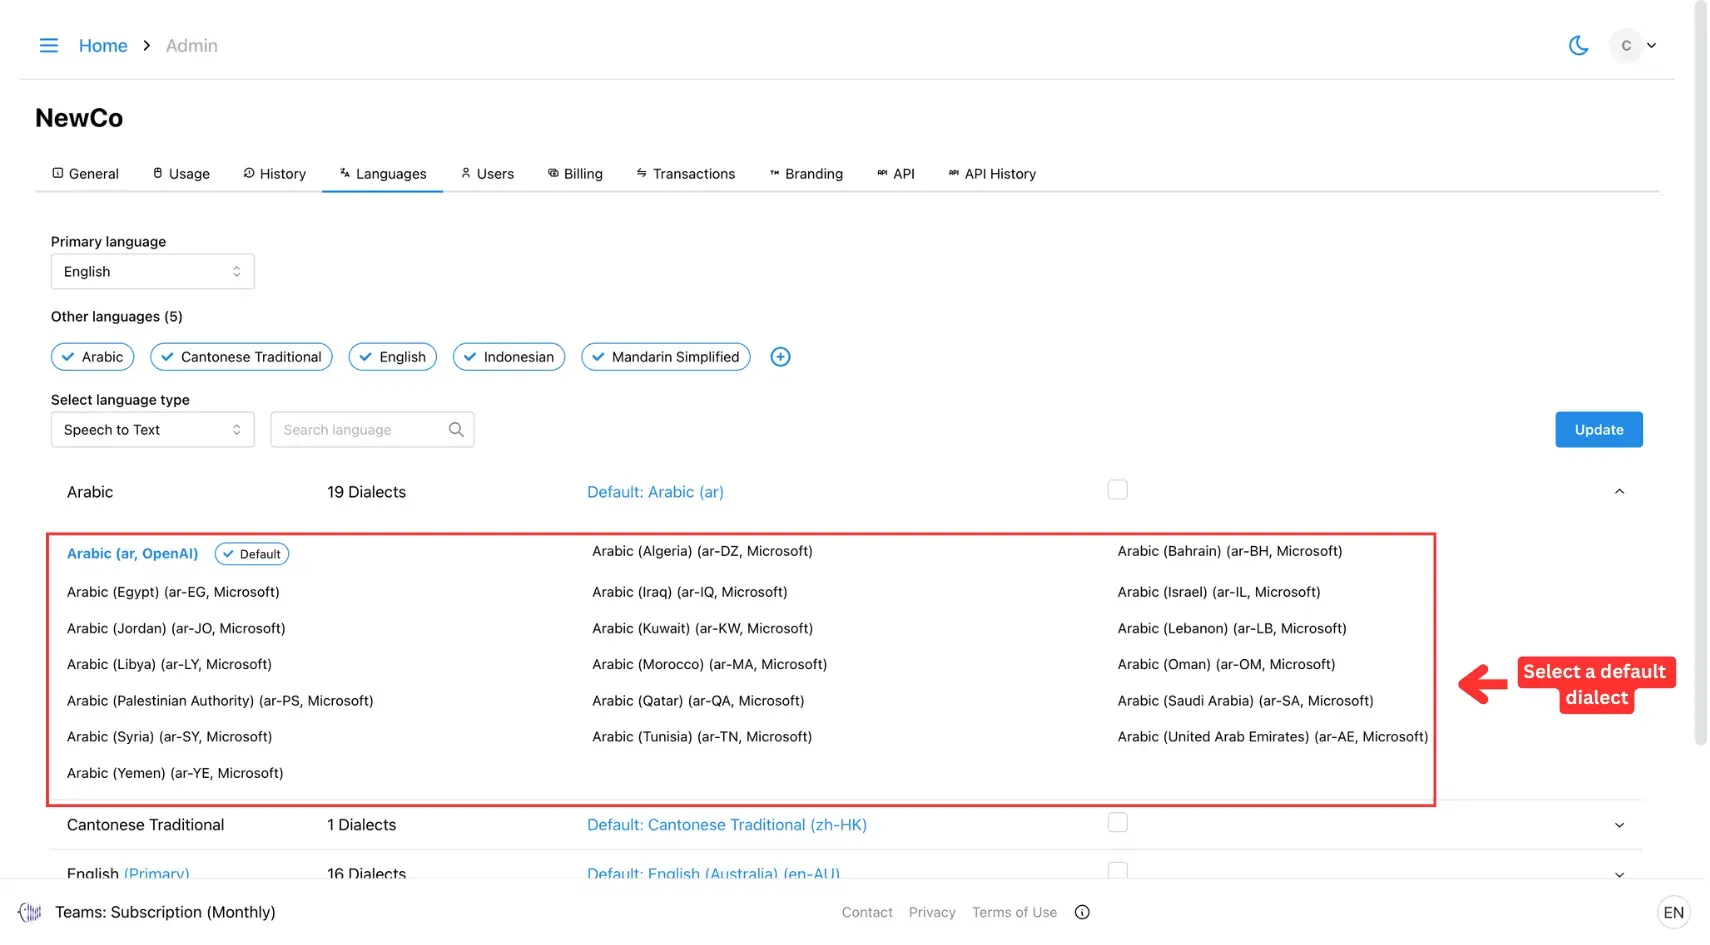
Use the toggle buttons to switch between these categories, then select your preferred dialect for each.
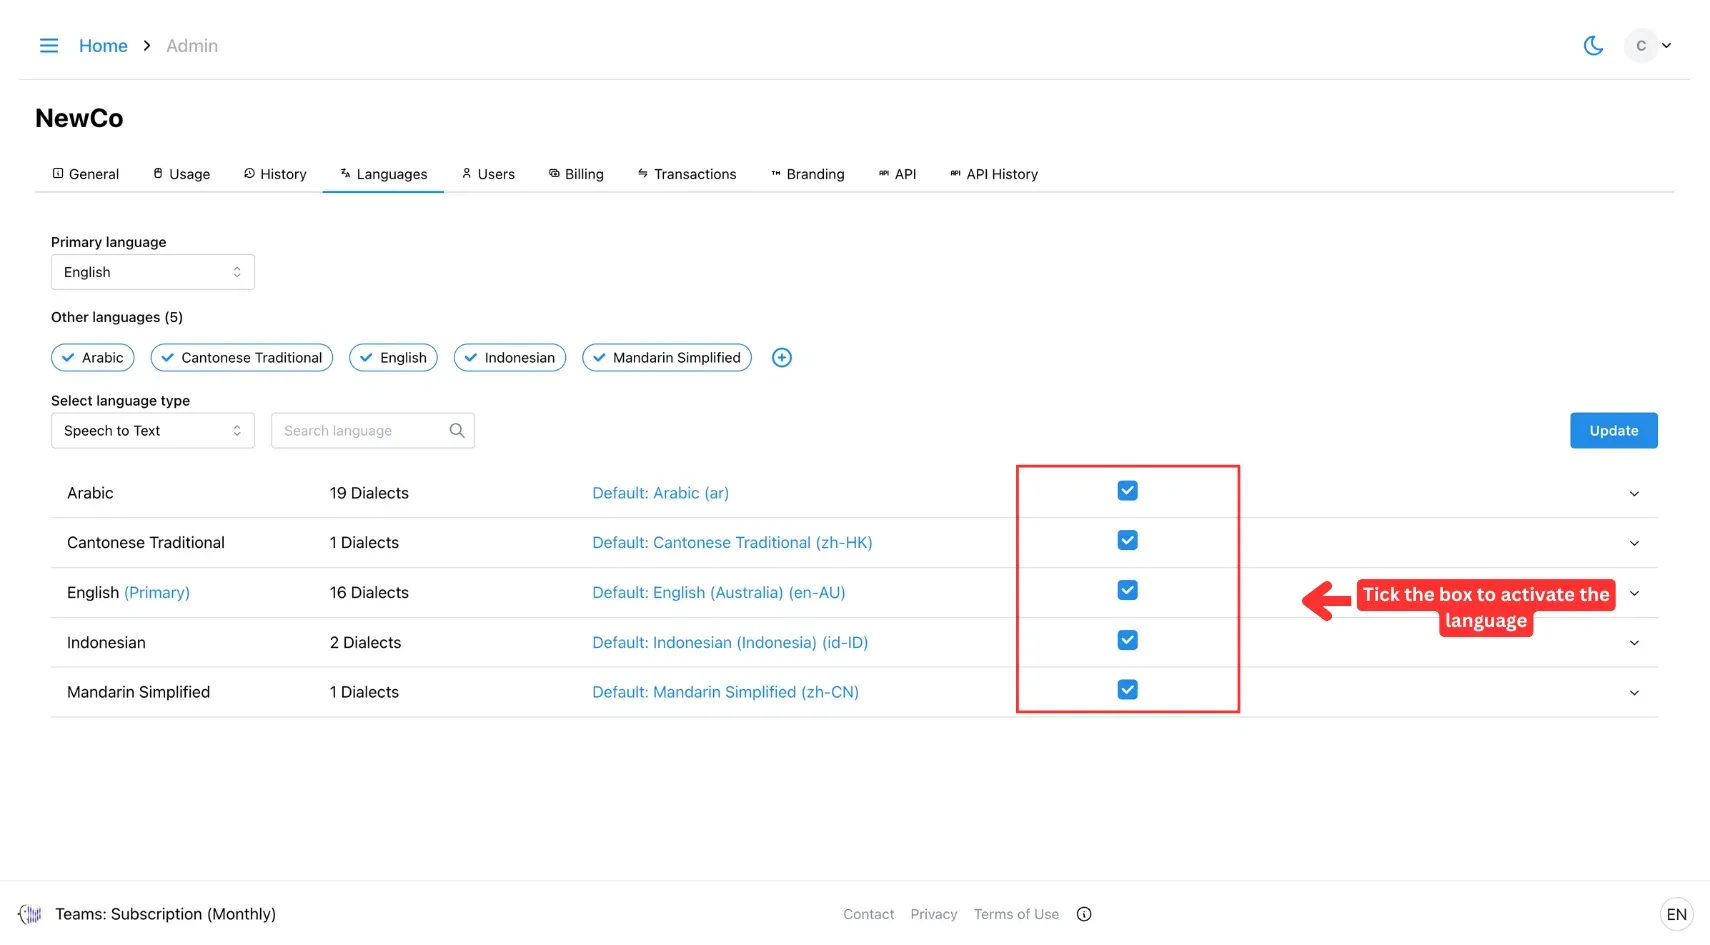
Step 6: Activate the Language
Make sure to tick the checkbox to activate the language in your environment.
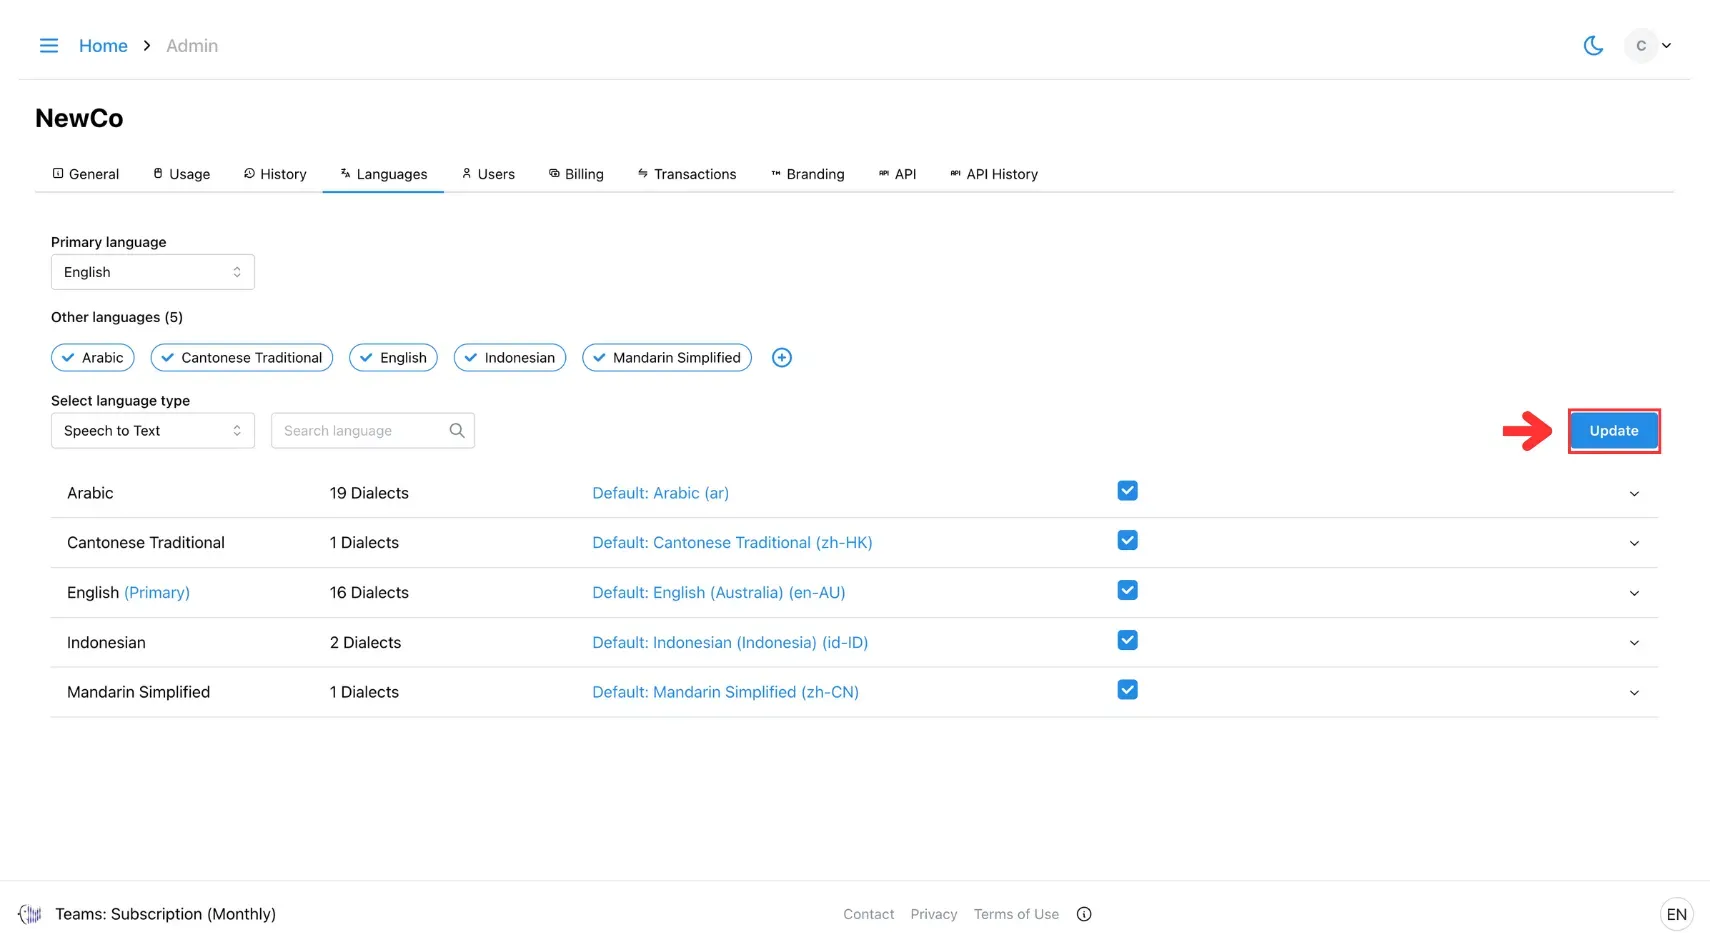
Step 7: Save Changes
Once all defaults are set, click Update to save your language settings.